Frequently Asked Questions
Story Tellers iOS Starter Kit 2 Documentation
How do I run the same Event on more than one node at once?
Using Events in the Story Teller’s Kit you’ll probably come across a situation like the one below, where you want to do the same event on multiple nodes. For example, set GravityOn to more than one element.
![]()
Any Event property that takes a single String type value can be switched to an Array to do the same event more than once, on multiple nodes. In the property list, simply hold down on the Type column, and switch it to Array.
![]()
Now you can list multiple nodes by clicking the plus-icon.
![]()
There’s no limit to the number of nodes you can add to the Array! And remember every property that takes a single String value can be switched to an Array.
This is also true for Events that are setup as Dictionaries (these Events require a bit more information so a dictionary is required).
For example, notice how the SetValues property has multiple entries…

Each line is setting a value (for variables named BalloonCount, CloudCount, Notes).
How do I delay running events?
There’s TONS of different ways to run events in the kit. Events are a term used in the kit to pretty much describe doing anything (playing sounds, running actions, hiding things, etc). There’s hundreds of events. One of the most common ways to run one (or more) is to create a dictionary called Events and put it in the root of your page. For example…
You can also run events by touching elements, touching up from elements, physics interactions, after you check the value of something (using EventListeners), when gestures run, etc.
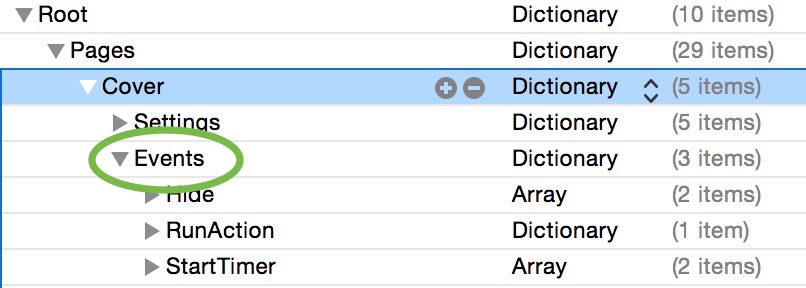
But sometimes you just simply want to delay an event. So perhaps, two seconds after the page/SKScene loads, you want to do something. This is why we have EventTimers. These are listed in the root of the page dictionary (just like the Events dictionary was). Below is a folded up example of two event timers…
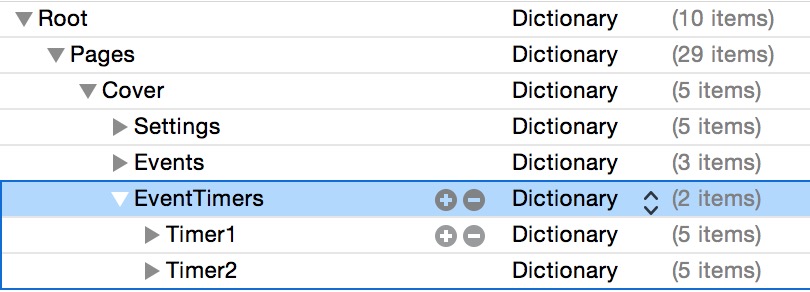
Let’s unfold Timer1 and take a look at it…
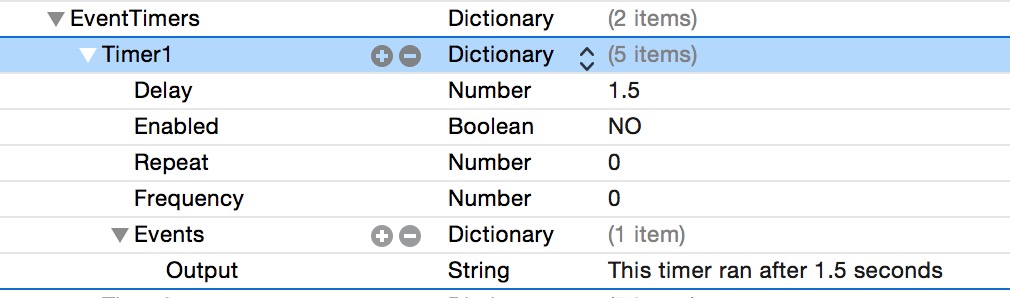
For this example, I’ve set Enabled to NO, so it won’t run automatically. If it was YES though, it would call the Events listed 1.5 seconds after the page loaded (for this article, it’s more interesting if I get to show you how to start the timer if it isn’t enabled though). Notice too that the Events dictionary has a single entry named Output. Using the Output property is a great way to test if something is working, because Xcode will output whatever you write in the value (for future reading, you can also use OutputValue to check the value of something).
So let’s go back and start that timer since it’s Enabled property is NO.
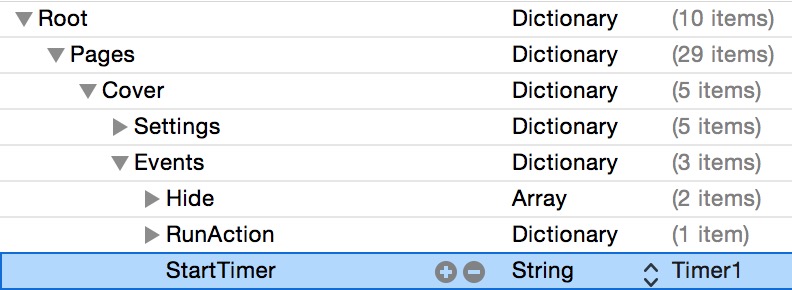
Notice the property is StartTimer and the value is Timer1. Your timers can be named anything you want, you obviously just need to match the name to whatever timer is listed in the EventTimers dictionary.
So what if you want to start two timers at once? Simply switch the StartTimer type from String to Array, and list as many timers as you want to start….

ANY String based event can be switched to an Array to do the same thing multiple times.
You can read more about EventTimers here.
What if I want to do one thing if the user has purchased a product and a different thing if not?
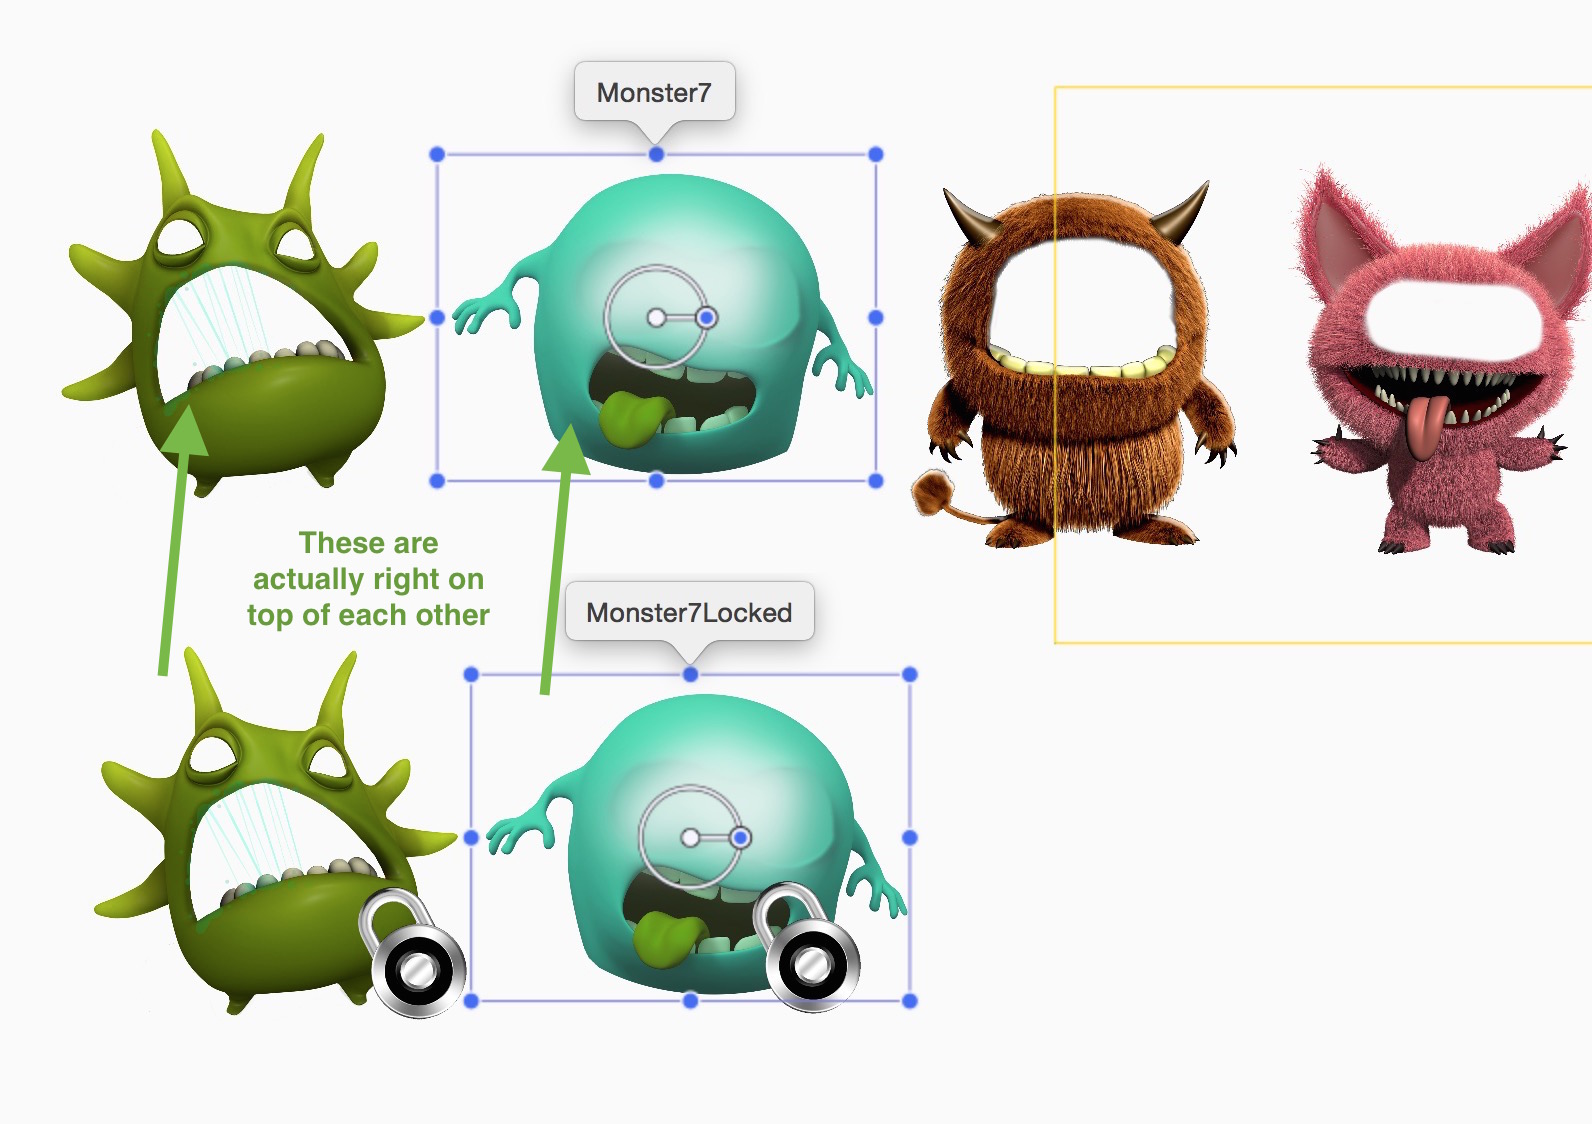
We just did this in our demo app. Its very simple. You’ll probably want to do this in a menu which gives users a path through your book or app and restricts certain areas. For example, the image below, shows a panning menu of monster costumes. Notice we have two Elements selected below, Monster7 and Monster7Locked. Normally these are right on top of each other, but for the purposes of this article, we’ve moved Monster7Locked down so both are visible.
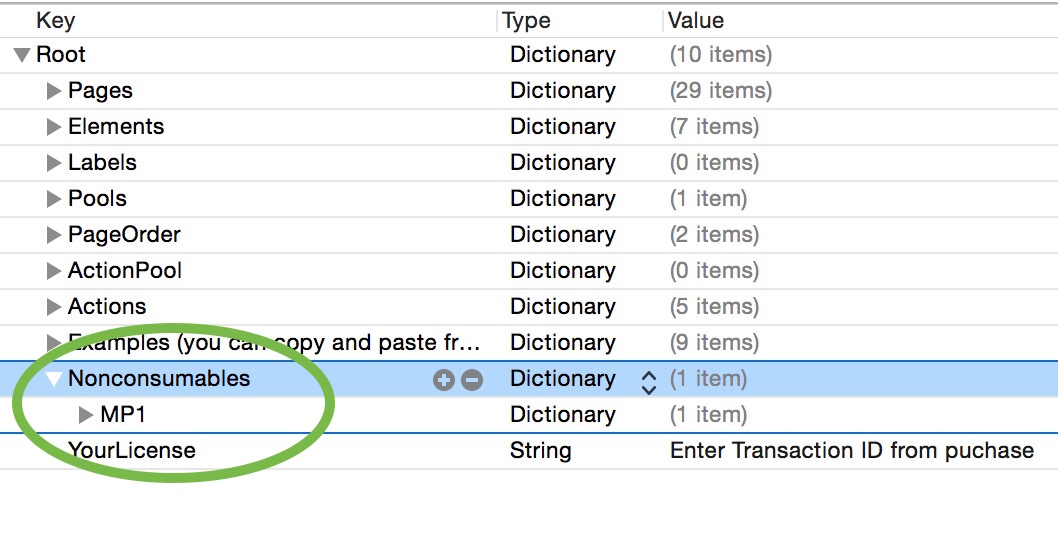
We won’t go into every step of creating an In-App Purchase here, but let’s at least highlight the Nonconsumable product in this example is named MP1. Info on setting up In-App purchasing is available in video and written format here.
So with both Nonconsumable and Consumable products the kit will note the the product ID has been purchased by saving a value (technically an NSUserDefault) with a key matching the product ID and a value of “Purchased”. In pseudo code, this would look like…
MP1 = Purchased
Using EventListeners we can check if MP1 equals or does not equal Purchased. Take a look at the setup, with the EventListeners folded up first…
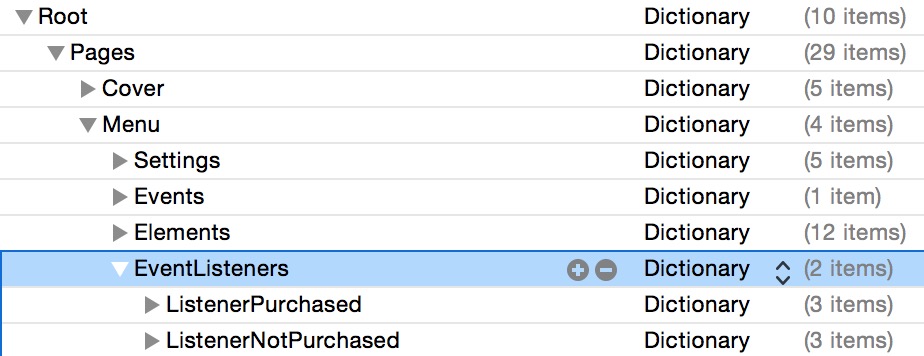
Notice we have two listener names, ListenerPurchased and ListenerNotPurchased). These can be ANY name of your choosing. The name is only used if you plan on starting or stopping the listener. Let’s unfold ListenerPurchased and just look at those properties…
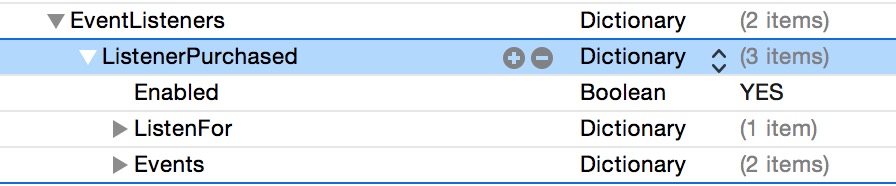
Notice Enabled is set to YES, so this listener is automatically running (it runs by default 4 times per second). And we have two interior dictionaries. ListenFor and Events. ListenFor is specifically used to check if a value equals something. Let’s unfold that…
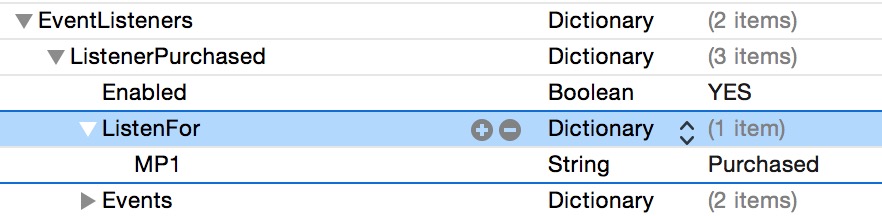
So we are checking to see if MP1 equals Purchased. If so, the Events dictionary will run and by default the listener will stop (listeners can be set to always run if you want). Let’s look at the Events…
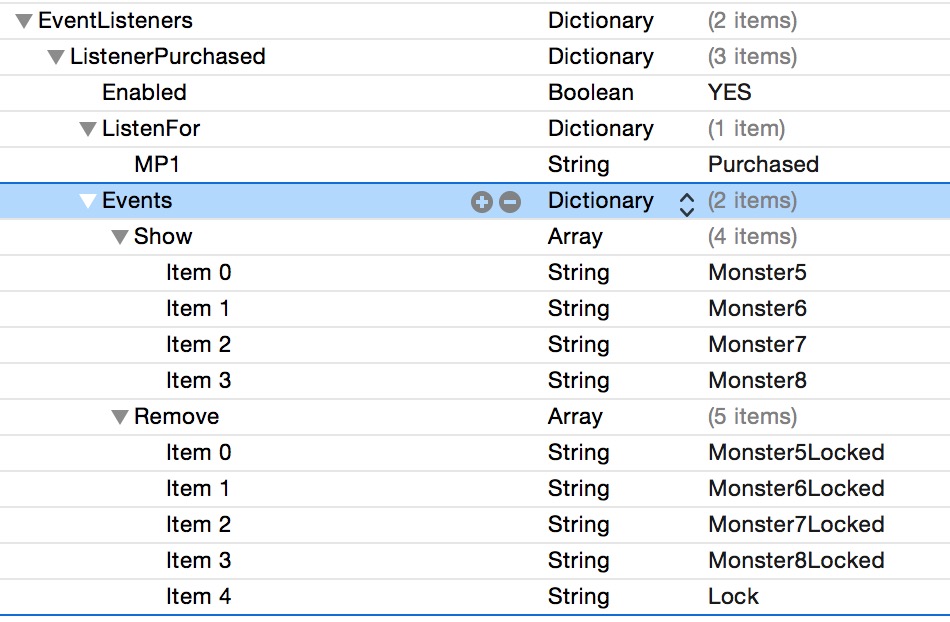
Notice we have a Show and Remove event. Show lists all the Elements to Show (initially they all had their Hide property set to YES) which are all the menu Elements that go to restricted parts of the app. Then Remove lists all the Elements to remove, which are the menu Elements that didn’t allow access to the restricted areas (they all went to a Parental Gate page, which then led to a Store page).
The ListenerNotPurchased dictionary does just the opposite by using the ListenFor!= property to check to see if MP1 does NOT equal Purchased. And if not, it runs events to show / hide the opposite menu items.

Using the same setup above you can tailor any page / scene to do something based on a particular product being purchased or not.
If your product was Consumable, for example, you’ve created an in-game currency type system, you can check to see if the amount of currency (coins, tokens, socks) is greater than a specific amount using the ListenFor> property. For more reading, visit the EventListeners section.
How do I move just one thing when I have other things panning?
This is a fairly common situation in any app. You might have a menu of thumbnails that slide back and forth using the pan properties, but don’t want that to occur when, for example, the user touches a Butterfly to move it around. Here’s how that would look…
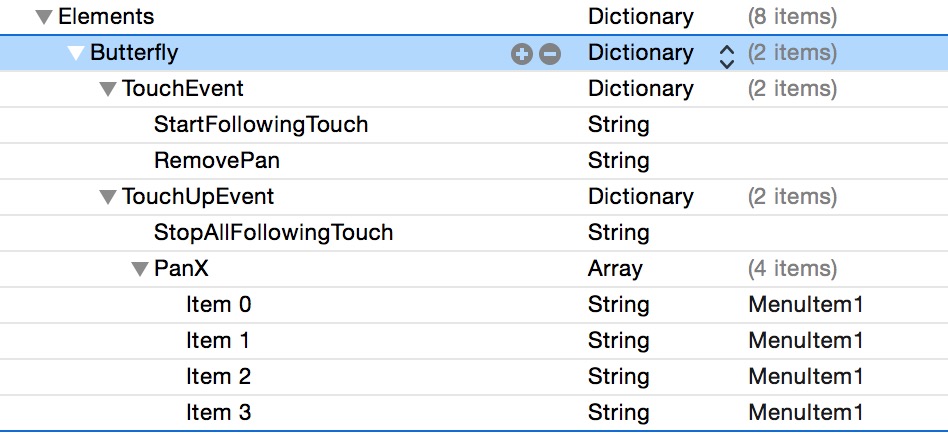
The Butterfly has both a TouchEvent dictionary and TouchUpEvent dictionary. When the user touches down on the Butterfly, we run StartFollowingTouch (which makes the butterfly art follow the user’s finger movements) as well as RemovePan (which removes anything that was previously set to pan). Then when the user lifts up their finger, we run StopAllFollowingTouch which stops the butterfly from following the user’s touch (lifting up also does that naturally anyway) and PanX. Notice PanX is an Array which defines what nodes / elements will pan based on the user’s touch. So after moving the butterfly, if the user touches anywhere else on the screen and move’s their finger back and forth, the menu items will pan. Panning is slightly different than a direct follow of the user’s touch, as the items panning move in relation to the finger movement but are not directly tied to it’s exact location.
How do I change the text of a button when pressing down on it?
You’ll want to keep your label and button separate. Your button can be any Color Sprite in the scene, even one that is invisible (for example, a Color Sprite with the color’s alpha turned down to 0). As usual, your Color Sprite, should set a Custom Class of Element, so you can set properties for it. In this example, let’s name it MyButton…

Using the TouchEvent and TouchUpEvent, we will toggle a saved value named LabelText. For example…

Next we will create the label. Name it ButtonLabel.

Back in the property list, we will set the TextWithSavedValue to LabelText. If you want, you can also set TextIfNoSavedValue, which will give the label a default value.

Anytime the LabelText saved value is changed, any labels that use that value will be updated. So pressing down on MyButton will toggle the text of ButtonLabel.
If you stumbled onto this article, it is part of our documentation for the Story Tellers iOS Starter Kit 2. The kit enables you to make children’s book apps and games without writing any code! But it is Swift 2 based and compatible with iOS9 (or higher) and Xcode 7 (or higher), so kit buyers can even extend the functionality to fit their needs further. Some of what we cover in the kit documentation may apply to Xcode in general, so this article could be worth a read even if you aren’t a user. You can purchase Lifetime Updates the kit here, or subscribe Yearly to CartoonSmart and get the latest version, plus access to all of our other kits / tutorials.
We’ve also created an iBook to document the very latest properties in the kit, so be sure to download that as well.