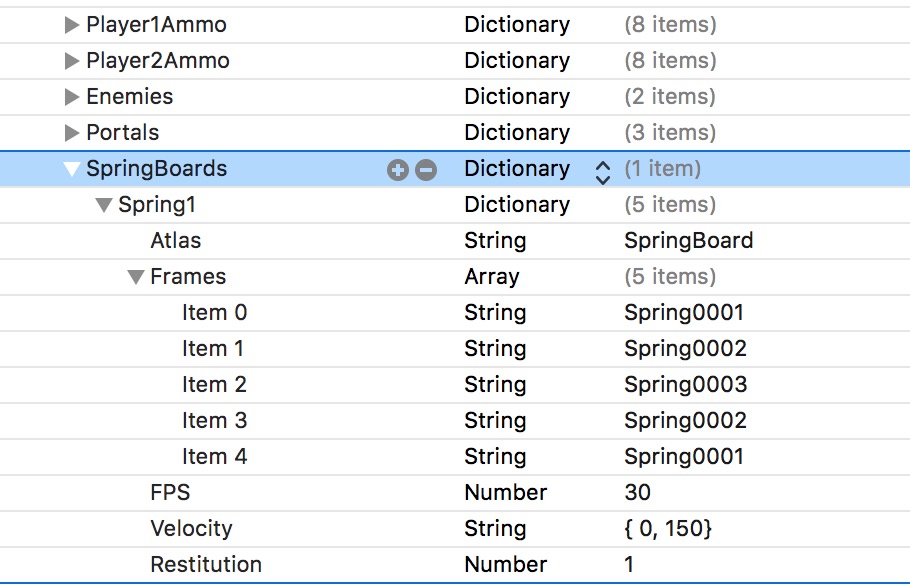
As of Build 1.61, you can include spring boards in the kit. You can have multiple spring boards with different properties, as long as each have a different name. The example image below shows the properties for a spring board named Spring1…
SpringBoard Setup Checklist
Setting up a SpringBoard-classed object in the scene is a 3 step process.
- Name the sprite! Very important as this name must match exactly the name in the property list. Without the name, the property list won’t know which SpringBoard you’re referring to.
- After texturing the sprite, give it a physics body so it can collide with the character. The body should be set to Alpha Mask.
- Give it a Custom Class of “SpringBoard”, see the image below for reference.

Animation Sequence Tips
Your spring board animation images should start with the spring in it’s lowered position. This image will be the one used in the Scene Editor, as the texture for the SpringBoard sprite. The image should have blank (transparent) space above the artwork extending to wherever the spring will eventually raise to. Notice in the example sequence below, Image 1 has plenty of negative space.
SpringBoard Properties
- Atlas – the name of the .atlas folder (imported to the kit) containing the animated frames for the spring.
- Frames – an Array containing the frame names for the animation. These will probably go in order upwards, then back down again. For example, frame 1, 2, 3, 4 then 3, 2, 1
- FPS – The frame rate for the animation. Raise or lower this to time the spring effect with the velocity.
- Velocity – The velocity of the spring in { dx, dy } format. For example, a velocity written as { 0, 200} would only push the character upward on the y axis. a velocity of { 50, 200} would push the character the same amount on the y axis, but also forward on the x axis.
- Restitution – you can set an additional restitution or “bounciness” value for the spring. The normal range is 0 to 1, but you can go higher than 1. This doesn’t have much effect unless you have a very low velocity.


