Now that Xcode 9 is out of Beta, it’s about time for us iOS developers to get serious about upgrading our past projects. Since we here at CartoonSmart provide you with a plethora of Swift projects, this can be a nail-biting time of year because we never know how painful that upgrade process might be.
Well good news! It really couldn’t be easier. Xcode 9 will step you through the upgrade process with a couple of prompted screens. You do have two upgrade options, so in this article we’ll cover what happens with both. This update probably won’t change any Sprite Kit code. At least so far, I haven’t seen anything I’ve written get changed. Which really means Swift 3 and Swift 4 are pretty identical in terms of Sprite Kit (more good news). The upgrade will probably just add @objc before few functions and require a quick change in your Build Settings.
Buuuut with that said, make a back up of your project now. Hey, ya never know.
Not into the whole reading thing. Watch the video version instead.
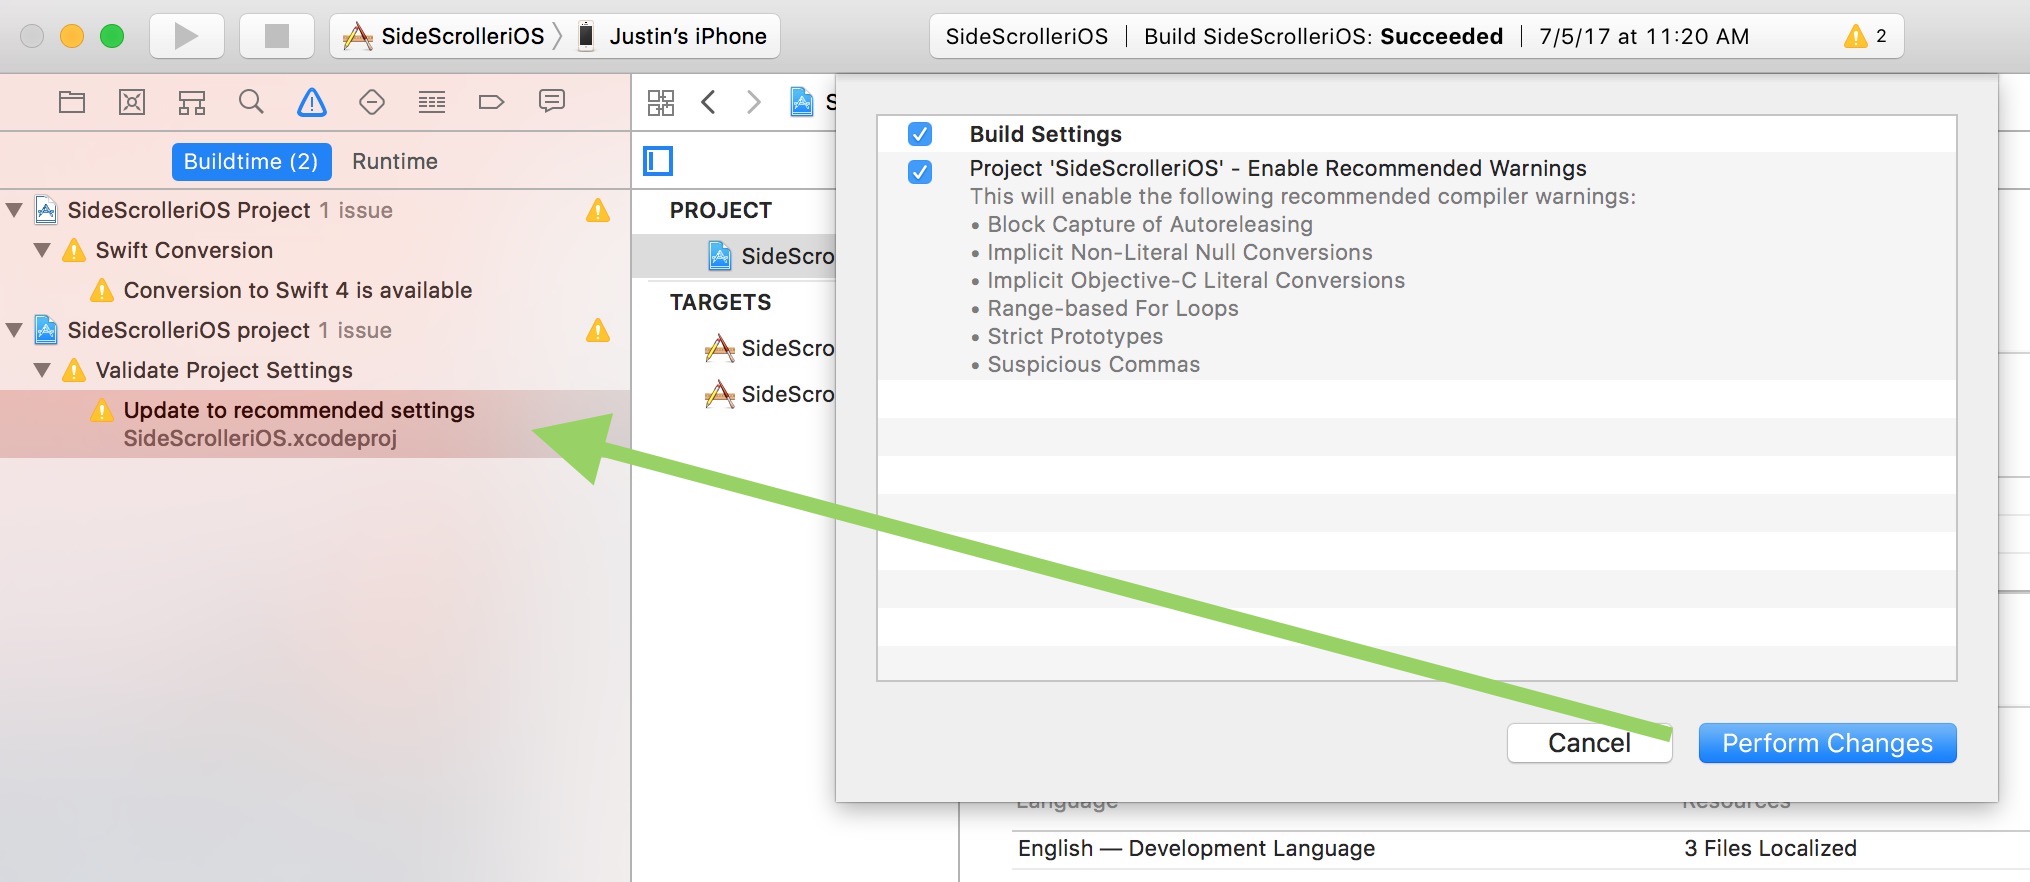
Update to Recommended Settings
This prompt comes with just about every minor update of Xcode, and isn’t really related to the main topic of this article. Go ahead and tap this prompt and hit Perform Changes. Historically I’ve never had an issue blindly doing this.
Now for the Swift 4 Conversion
Tap the prompt and lets start with the first (possibly only) Target to convert.

After tapping Next, you’ll come to a fork in the road…

If you switch to Match Swift 3 Behavior you’re probably done. But obviously that part that says “(recommended)” and “reduced binary size” will pull you in like a tractor beam toward the first option. So let’s do it.
You’ll see this prompt next, you don’t really have much of a choice here, just tap OK. You’ve already committed to dealing with some Manual Steps (which is why you’re reading this article)

Review Changes
Time to see what Xcode 9 deemed necessary to change to go from Swift 3 to Swift 4. Like I mentioned earlier, if this is a Sprite Kit project you probably won’t see any changes to your code. But Xcode will insert this @objc thing in front of some of your functions. Notice where it did to our Platform Games Kit.
So that’s really just 5 changes in a project with thousands of lines of code. And these insertions are only in cases where we the function call was made by using the #selector reference, which is typically rare anyway. You do that with notifications and gesture recognizers.
So why’s that @objc snippet there anyway? Well here’s how I understand this (keep in mind, I went to college back in the late 90’s for animation, so I can’t get too deep with the computer-sci lingo), but here goes. I guess there was always some under-the-hood inference going on between Swift and good ol’ Objective C. In the upgrade process we minimized that, so it’s no longer always going on in every function, and instead only happening in places where we mark it with @objc.
Build Settings
Last step. In your general settings tap your Target (you might only have one if its an iOS only project), and head over to Build Settings. In the search bar, type in “Swift 3”, then under the Swift 3 @objc Inference setting, switch it from On to Off.
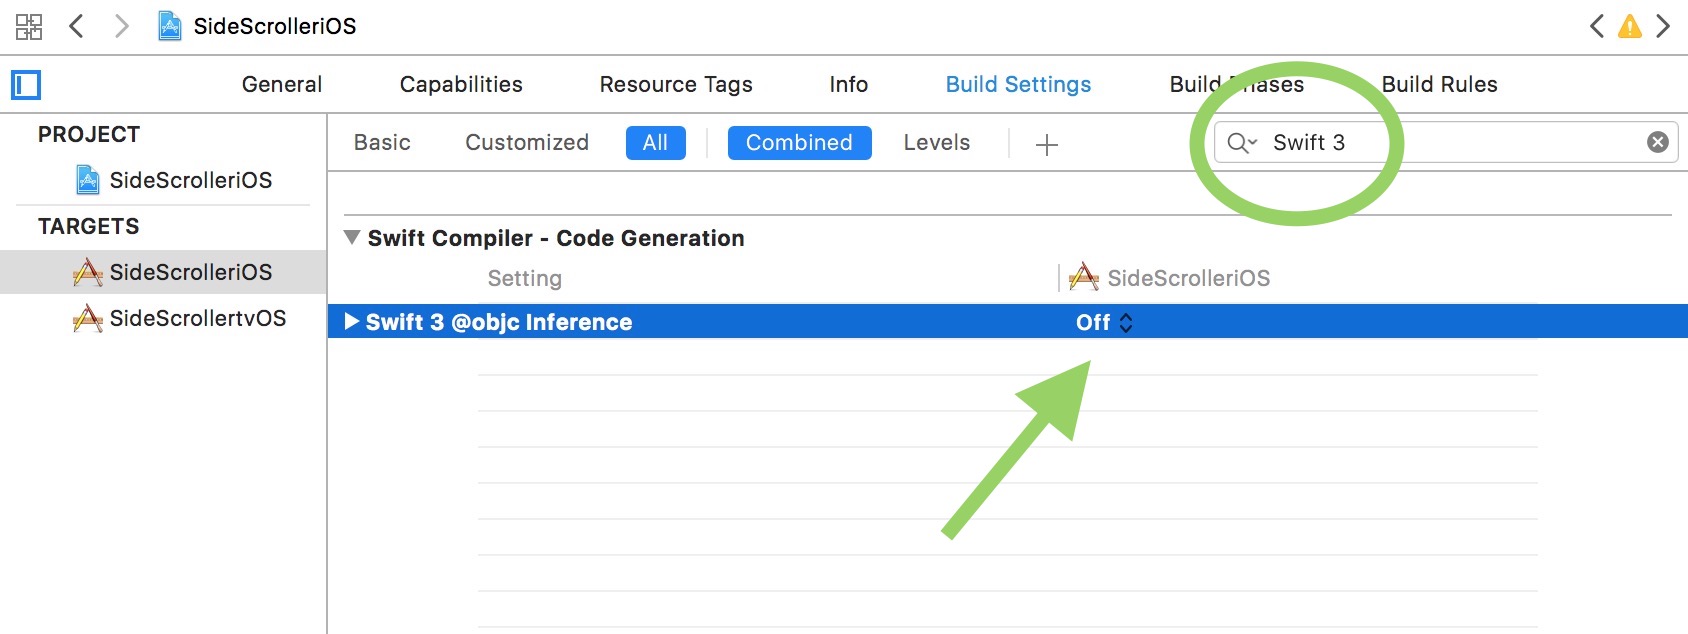
This was the manual step we needed to make. If you created a new Swift project in Xcode 9, this inference would already be off.
Repeat and Rinse for other Targets
You’re just about done. If you have a tvOS target, do the same thing. Most likely, all the code already has the @objc snippet added, so adjusting other Targets won’t add anything. But you do need to adjust the Build Settings for each target.
Once you’re done, hit Run and you should be good to go! Take a look at the now upgraded Platform Games iOS / tvOS Starter Kit…
That new Promoted In-App Purchase Code
This is slightly off-topic but worth mentioning if you’re upgrading any of our kits on your own (which if you’ve modified the kit a lot is probably a good idea). Copy and paste the code below into any of the Swift files that end in “_Store.swift” …
func paymentQueue(_ queue: SKPaymentQueue, shouldAddStorePayment payment: SKPayment,
forProduct product: SKProduct) -> Bool {
// Check to see if you can complete the transaction.
// Return true if you can.
return true
}
Apple wants to see this code in any future apps submitted to the store. It allows their new Promoted In-App Purchase feature to work,