When you think of maze games, you’ll probably think of Pac-Man, which isn’t hard to argue is the most popular game of all time. At that game’s core is a simple hook. Move at high speeds and don’t get caught, which is a fun concept for any player of any age. Even today some of the most popular games don’t rely on much more than a classic hook: something that is easy to play, but impossible to beat. A game like Flappy Bird is a recent testament to that. In this tutorial series, we’ll look at programming a conceptually simple game, but one that can be expanded in a hundred different directions using Apple’s amazingly easy physics engine. You’ll learn the latest in iOS programming technology: Swift and Sprite Kit. Then for level design, you’ll get two options: create levels within Xcode 6 or 7 using the new Scene editor, or take a step outside Xcode and use Tiled, a free level design program which in our opinion, is a tad more refined and speeds up level creation. After this series, you will be a game developer! Ready to submit your first app for the iPhone, iPad, and possibly even Apple Watch. Plus with upcoming third party utilities you can even export your app to Android and a plethora of other devices. Note: Projects files from each session have been updated for Swift 2.0. Changes are all very minor.
This course is taught by Justin Dike, owner and lead developer at CartoonSmart.com, creator of the Fantastic Worlds iOS Starter Kits, and author of iOS Game Programming with Xcode and Cocos2d (published by Focal Press). Justin has been programming iOS games since the release of the first iPhone and has been teaching development for just as long, covering mostly game related topics. He’s proficient with Cocos2d, Sprite Kit, Objective-C and most recently Swift.
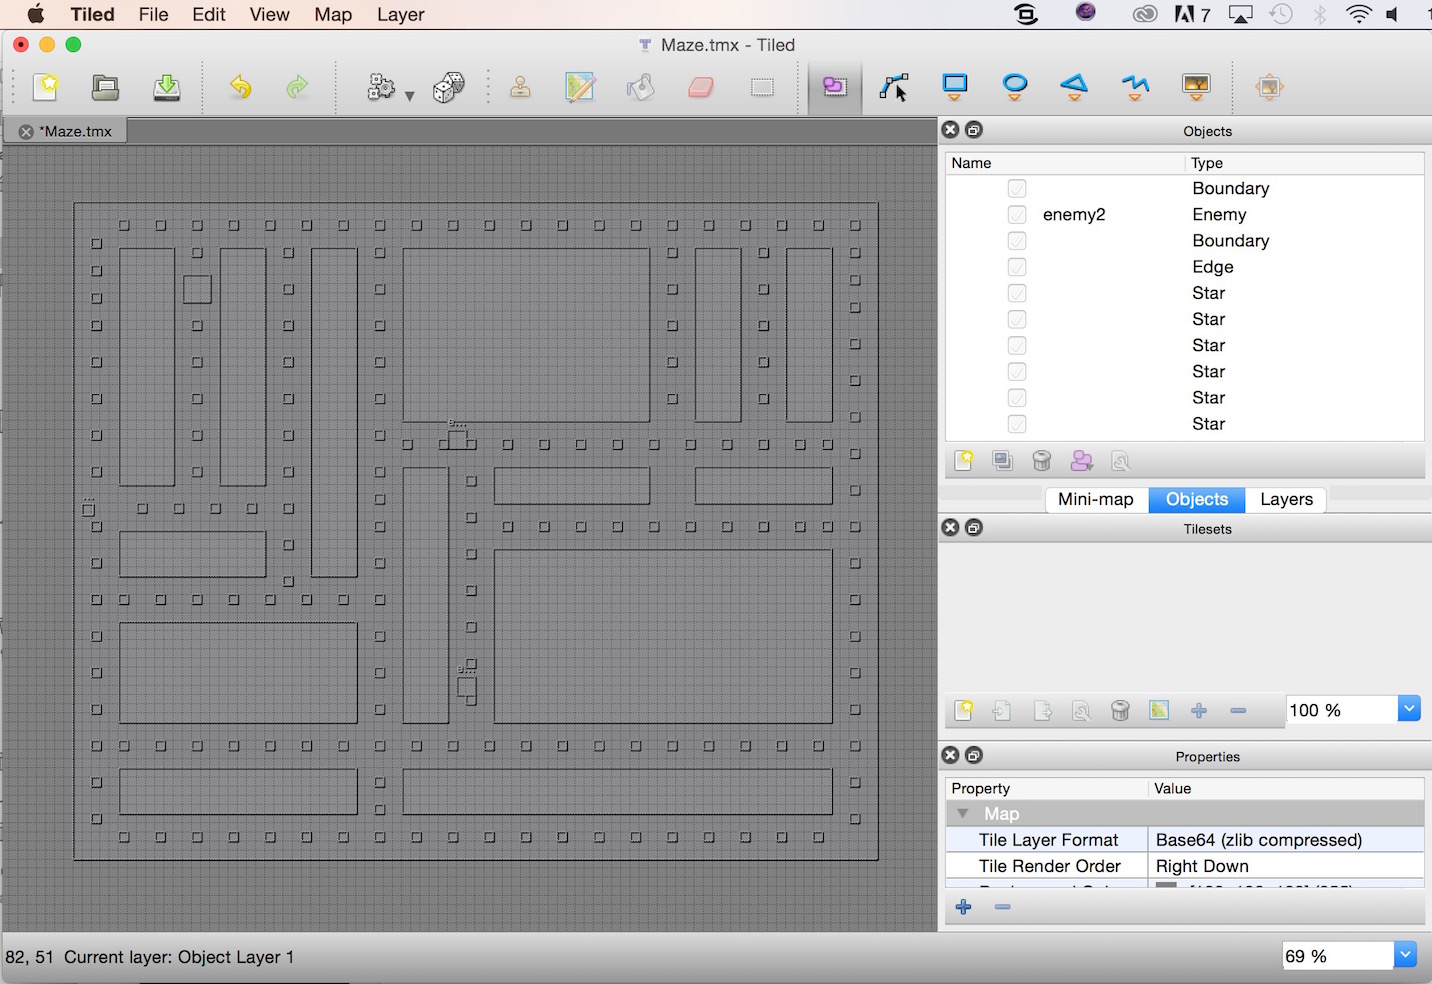
The tutorial will teach you how to layout and design your levels using Tiled, a free software available from MapEditor.org. Tiled saves files in an XML format, so you’ll learn how to not only parse .tmx files, but any kind of XML data. This also gives you the flexibility to make mass changes to the level via any text editor by finding and replacing text. So for example, you could rename every boundary from “Boundary” to “PushableBoundary” which can be incredibly useful when creating multiple levels. Objects setup within Tiled will get placed in the scene by the code you’ll learn to write in Xcode. Essentially we’ll be looking at a Type value we specify in Tiled (for example, “Boundary”, “Enemy”, etc) and then placing a custom class of that type into the scene. We can further specify details about each object in Tiled by including a Name value (like “RedEnemy”, “StartingPoint”). So for example, you could create an Enemy class in the scene, with specific functionality if it was a “RedEnemy’.
If you choose to build your levels directly within Xcode, you’ll learn how to use the new Sprite Kit Scene editor available in Xcode 6 (and up). This allows you to work exclusively within Xcode to build everything for your game. If you haven’t upgraded to Yosemite, it is highly recommended you do before using the Scene Editor (otherwise, there is a lag when placing objects). The SpriteKit Scene editor lacks some of the workflow benefits of Tiled. For example, snapping to a grid or selecting and copying objects as a group can be a bit tricky. Children created within the scene editor are limited to SKNodes, SKSpriteNodes, SKShapeNodes and some other physics field types. This means to make use of our custom classes, like Hero, Enemy, Boundary, you’ll learn how to find children in the scene editor and replace them (by name) with our classes. Which is essentially what we’ll be doing when parsing Tiled files. So although the tutorial teaches both layout options, there is a lot of overlap in the code.
Like all our tutorials, you get the finished Xcode project from the course, as well as the project files from the end of each session (updated for Swift 1.2). The finished project contains an enormous amount of source code portable to any of your apps in the future.
Alan Thomas gave us a first look at his app made after taking the course, and here’s what he had to say, “I promised to show you my game that is inspired by the Maze Game tutorial series. I’ve got my first gameplay footage here…”
Get Lifetime Access to this course for a one-time purchase price. You can download (or stream) the movie files and download any source projects. Already have Lifetime Access? You can get started watching the video tutorials from right here. Both Monthly and Yearly Subscribers can stream every video tutorial on the site. Yearly subscribers get access to the latest version of every starter kit whenever they want, plus access to hundreds of dollars worth of royalty free game art (yes, it’s an amazing deal). You can cancel your Monthly or Yearly subscription anytime directly through Paypal. Already a Subscriber? Get started on the course from right here.A step-by-step video tutorial series teaching three technologies for building iOS Games:
![]()


Classic game concepts. Modern programming.
About your Instructor...


Over 7 Hours of Swift and Sprite Kit Tutorials, broken into bite-size chunks

Session 1 – Creating the Hero
Session 2 – Building the Maze in an SKS or Tiled File

Session 3 – Sensors, Edges, and Enemies

Session 4 – Property Lists, Text & Sounds

Session 5 – Easy-to- Implement Extras / Student Suggestions
Can’t decide between level design using Tiled or the new Sprite Kit Scene editor?…
Why not learn to use both then?
Build with Tiled…

Read about using Tiled
Build within Xcode…

Read about using the Scene Editor
Every student graduates with a mighty parting gift!
After your purchase, you’ll always have the code to…

Check out some student work!


Two affordable purchasing options…
Purchase Option 1 - Lifetime Access
Purchase Option 2 - Subscription Access