iOS and Art Subscription Portal
You can find all the courses in this subscription below. If you are logged in and have an active subscription, you can get started now. To subscribe, visit this page.
Side Scroller Game Development for iOS / Mac Os - Subscription Access
Learn to create amazing games from scratch in a minimal time by understanding the SpriteKit framework and Swift. All while building a fun side scroller template in Xcode. This course is intended to take you from start to store over 50-plus lectures and nearly 6 hours of content.
NOTE: This course will probably not be updated for Swift 2. We have two other side-scroller themed courses. The Endless Worlds course and a new tvOS / iOS side scroller course, titled Learn tvOS for Game Development
| Module 1 | Introduction | |
| These videos will introduce the course and provide a roadmap for what's ahead. We'll also discuss some of what's required, namely a Mac with Xcode installed and some initial foundation with Swift, or programming in general. Optionally, it is recommended you have an Apple developer account and test device. | ||
| Unit 1 | What you will learn | |
| Unit 2 | Why Swift and why Sprite Kit | |
| Unit 3 | Course Roadmap | |
| Unit 4 | Course Requirements | |
| Unit 5 | Course Assets | |
| Module 2 | Fundamentals of Sprite Kit | |
| In this series of video, we will cover all sorts of basic Sprite Kit and Swift topics including: SKNode, SKSpriteNodes, SKActions, the Game Loop, Physics and much more. | ||
| Unit 1 | Welcome to Nodes | |
| Unit 2 | Introduction to Xcode Playgrounds | |
| Unit 3 | Nodes in Swift | |
| Unit 4 | Introduction to Xcode Projects | |
| Unit 5 | Introduction to SKNode and SKSpriteNode | |
| Unit 6 | SKNode and SKSpriteNode | |
| Unit 7 | Introduction to SKLabelNode and SKEmitterNode | |
| Unit 8 | SKLabelNode and SKEmitterNode | |
| Unit 9 | Making Things Move | |
| Unit 10 | SKActions | |
| Unit 11 | The Game Loop | |
| Unit 12 | Physics in Sprite Kit | |
| Unit 13 | Controlling the Game | |
| Unit 14 | Control Methods | |
| Unit 15 | Game Design Architecture | |
| Unit 16 | Basic Game Architecture in Swift | |
| Unit 17 | SKLightNode Textures for Upcoming Videos | |
| Unit 18 | Introduction to Normal Maps for use with Lighting | |
| Unit 19 | SKLightNode and How to Use It | |
| Module 3 | Pre-Production for Your First Game | |
| In this series of videos you will learn how to design your game, build a prototype, design your game architecture, find useable resources, create title graphics / icons and more. | ||
| Unit 1 | The 10 Step Game Development Workflow | |
| Unit 2 | Designing Your First Game | |
| Unit 3 | Build a Prototype | |
| Unit 4 | Design Your Game Architecture | |
| Unit 5 | Source your resources | |
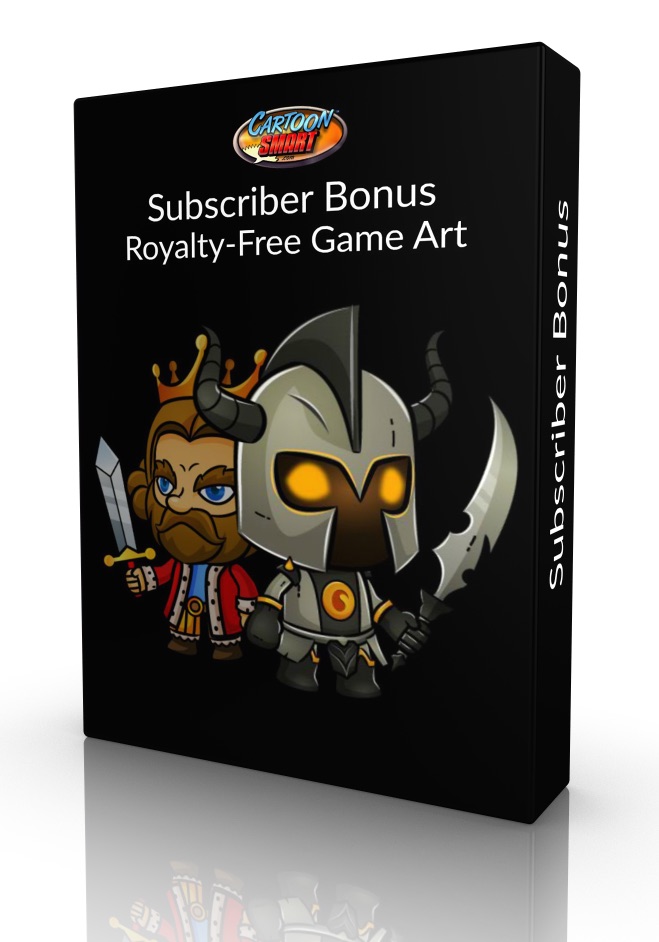
| Unit 6 | Finding Royalty Free Game Art | |
| Unit 7 | Create a Title Graphic | |
| Unit 8 | Create Game Icons | |
| Module 4 | Building the Side Scroller App | |
| Production REALLY gets underway in this lengthy section. You'll be building an entire game engine essentially, including parallax backgrounds, game world tiles, controlling the player, adding sounds, and everything else you can think of to make a side scroller game! | ||
| Unit 1 | Notes for Swift 1.2 Changes | |
| Unit 2 | Build Your Game Engine | |
| Unit 3 | Template Walkthrough | |
| Unit 4 | Preparing the structure of the project | |
| Unit 5 | Setup the main menu | |
| Unit 6 | Create a Parallax Background | |
| Unit 7 | Preparing the GameScene | |
| Unit 8 | Setting up the Game World with Tiles | |
| Unit 9 | Create a Player | |
| Unit 10 | Create a HUD with Controls | |
| Unit 11 | Jump, Throw, and Pause | |
| Unit 12 | Create a Destructible Crate | |
| Unit 13 | Triggers for wins, losses and collecting gems | |
| Unit 14 | Character Picker, Level Picker and Post Scene | |
| Unit 15 | Sounds and Music | |
| Unit 16 | Taking Advantage of Glyph Designer | |
| Unit 17 | Refine your game GUI | |
| Unit 18 | Add Icons to Your Game | |
| Unit 19 | Create the Content | |
| Module 5 | Finishing the App and Post Production for the AppStore | |
| This series of videos will deal with everything relating to polishing up your app and getting it ready for sale in the App Store! | ||
| Unit 1 | Pre-Marketing | |
| Unit 2 | Testing your App | |
| Unit 3 | The Product Submission and Launch | |
| Unit 4 | Introduction to Apple Developer Accounts | |
| Unit 5 | Create the Bundle ID | |
| Unit 6 | Introduction to iTunes Connect | |
| Unit 7 | Setting up the App in iTunes Connect | |
| Unit 8 | Submitting the App to Apple | |

The Artist's Guide to Apple Watch Apps - Subscription Access
This 5+ hour course is for artists that want to make an Apple Watch with little or no prior App development experience. By the end of this course, viewers will have created both art assets and an Xcode template to build an unlimited number of Apple Watches. Each watch can tell the time, day of the week, month and day in any style you want! Plus you can include animated images in the foreground or background of your time elements.
| Module 1 | Xcode Template and Adobe Flash Clock Template | |
| Below you can download the finished Xcode Template, which you can use to create countless Apple Watch apps, plus you can download the clock template in Adobe Flash for creating art assets to import into the Xcode project. | ||
| Unit 1 | Notes | |
| Unit 2 | Xcode Template and Adobe Flash Clock Template | |
| Module 2 | Creating the Art in Flash | |
| In this first series of videos we will be working in Adobe Flash to create assets we can export and import into Xcode later. You will learn plenty of tricks to making an accurate clock face, as well as learn how to animate looping elements (like watch gears). We will also discuss the particularities of displaying our art assets in Xcode. | ||
| Unit 1 | Introduction to Adobe Flash | |
| Unit 2 | How Elements are Arranged on the Watch | |
| Unit 3 | Drawing Precise Vector-Based Minute Markers | |
| Unit 4 | Adding Hour Markers | |
| Unit 5 | Drawing the Hour Hand | |
| Unit 6 | Adding and Animating the Second and Minute | |
| Unit 7 | Adding the Month, Day, Weekday and Adjusting Multiple Frames | |
| Unit 8 | Animating Gears and Changing Fonts Across Multiple Frames | |
| Unit 9 | Finishing Touches and Exporting | |
| Unit 10 | Exporting at 144 or 72? | |
| Unit 11 | Copying Assets into Xcode and Wrap Up | |
| Module 3 | Creating the Apple Watch in Xcode | |
| In this series of videos we will begin with the assets imported to Xcode and make a complete Apple Watch app from start to finish (the companion iPhone app will be created in the next section). If you've never used Xcode before, the course will discuss some of the fundamentals to get you on par with past users. | ||
| Unit 1 | Xcode Introduction | |
| Unit 2 | Installing Xcode | |
| Unit 3 | Watch App Initial Setup | |
| Unit 4 | Renaming the Bundle ID | |
| Unit 5 | Testing on the Simulator | |
| Unit 6 | Managing Your Layout / Workspace | |
| Unit 7 | Layout Basics | |
| Unit 8 | Adding Groups with Background Images to the Storyboard | |
| Unit 9 | Connecting Outlets from the Swift File | |
| Unit 10 | Getting the Time | |
| Unit 11 | Setting the Hour, Minute, and Second Hand Images | |
| Unit 12 | Setting the Month and Day Images | |
| Unit 13 | Getting the Day of the Week | |
| Unit 14 | Deactivate the Timer | |
| Module 4 | Creating the Companion App for the iPhone | |
| Apple Watch apps are actually extensions of a companion iPhone app, so in these videos we will use the same assets as before and make a working clock app for the iPhone. We will then create buttons which will let users customize the look of the Apple Watch and save their preferences. So changes we make to the iPhone app, will be saved on the Apple Watch app. | ||
| Unit 1 | Using Auto Layout in the iPhone App | |
| Unit 2 | Animating the UIImageView | |
| Unit 3 | Reusing our Time Code | |
| Unit 4 | Setting up the Segmented Buttons | |
| Unit 5 | Changing Faces | |
| Unit 6 | AppGroups and NSUserDefaults to Communicate Between Devices | |
| Unit 7 | Wrapping Up the iPhone App | |
| Module 5 | Submitting the App to Apple | |
| In this one video, we will discuss provisioning your app, creating the listing in iTunes Connect, and everything else related to submitting Apple your finished app right from within Xcode. | ||
| Unit 1 | Duplicating the Template and Preparing for Submission to Apple | |
| Module 6 | Adding More to the Xcode Template | |
| In these videos we will discuss adding audio to the Apple Watch app, using custom fonts with labels (which can be any font you want), paging through multiple screens on the watch, and programmably opening interface controllers when the app launches. None of these modifications are required, but could be useful in your many projects to come. | ||
| Unit 1 | Adding Audio | |
| Unit 2 | Using Labels to Show Time and Adding Custom Fonts | |
| Unit 3 | Paging to Different Screens on the Watch | |
| Unit 4 | Programmably Opening Other Interface Controllers on the Watch | |
| Unit 5 | Conclusion | |
| Unit 6 | Tips for Submitting an Apple Watch App | |

Swift and Sprite Kit Control Systems (updated projects for Swift 3) - Subscription Access
In this series of videos we will be exploring ALL sorts of ways to control characters in your game. These lessons will each stand on their own merit, so you don't have to muscle through a lot of previous videos to implement the type of control system you're most interested in. So we'll look at the simplest of movements, to virtual controls pads to using the accelerometer and so on.
| Module 1 | Tap to Move Controls using Swift and Sprite Kit | |
| In these videos we will look at simple tap to move controls. | ||
| Unit 1 | Swift 2.2 and Swift 2.0 Notes | |
| Unit 2 | Control Systems Project - Touch to Move | |
| Unit 3 | How to Tap Relative to the Character to Move | |
| Unit 4 | Control Systems Project - Touch to Move with SKActions from Point A then to Point B | |
| Unit 5 | Smooth Movements with SKActions | |
| Unit 6 | SKActions (continued) Moving to Point A, then to Point B | |
| Module 2 | Making Objects Follow a Path | |
| In these video tutorials we will discuss how to make a sprite follow a path. This could be useful for tower defense style games or classic-style arcade games like Space Invaders. And believe it or not, Sprite Kit actually has an SKAction specifically for following a path! | ||
| Unit 1 | Follow Path Project Files | |
| Unit 2 | Make an Object Follow a Path with SKActions | |
| Unit 3 | Make Multiple Objects Follow a Path (Centipede style) | |
| Module 3 | Using the Accelerometer to Control Movement | |
| These tutorials will focus on using the Accelerometer with Swift and Sprite Kit to control a character (or do things like balance / roll a marble). | ||
| Unit 1 | Accelerometer Project 1 Files | |
| Unit 2 | Accelerometer Basics in Swift | |
| Unit 3 | Accelerometer Project 2 Files (Movement on both X and Y) | |
| Unit 4 | Accelerometer on Both X and Y in Swift | |
| Module 4 | Gestures Recognizers | |
| These video tutorials will look at how to use gesture recognizers with Swift and Sprite Kit. We will start off though by looking at how to animate textures (image sequences) using a .atlas folder in Xcode. Tap gestures will trigger the animation. We will then create a project where a ship spins around using the rotation gesture, and aims toward a target that is also rotated in line with it | ||
| Unit 1 | Gestures Recognizers - Project Files | |
| Unit 2 | Animated Textures - Prequel to using Gesture Recognizers | |
| Unit 3 | Taps and Rotation Gesture Recognizer Tutorial | |
| Unit 4 | Rotating and Moving a Ship and Target | |
| Unit 5 | Swipe Gestures and Rotating Based on Degrees | |
| Unit 6 | Pan Gestures vs touchesMoved and convertPointFromView | |
| Unit 7 | Pinch and Long Press Gesture Recognizers | |
| Module 5 | Virtual Joysticks | |
| These video tutorials will look at how to create a virtual joystick with Swift and Sprite Kit. | ||
| Unit 1 | Virtual Joystick - Project 1 (the project after the next two videos) | |
| Unit 2 | Initial Setup of a Virtual JoyStick with Swift and SpriteKit | |
| Unit 3 | Top Down Movements and Speed Based Controls using a Virtual Joystick | |
| Module 6 | Virtual Joystick in a Side Scroller Style Level | |
| In these iOS video tutorials we will continue working with our virtual joystick from the previous section, and extend the functionality to a side-scroller style level. This will involve creating a physics based Sprite Kit world, with classes for the Player and Object. We will fine tune the level of player control with each video. | ||
| Unit 1 | Virtual Joystick - Project 2 - Side Scroller Style (the project after the first three videos) | |
| Unit 2 | Modifying the Scene for Side Scroller Play and Creating the Player Class | |
| Unit 3 | Creating an Object Class from SKNode and Using a Dictionary to Initialize It | |
| Unit 4 | Using the SKPhysicsContactDelegate to detect contact between Player and Object | |
| Unit 5 | Virtual Joystick - Project 3 - Side Scroller Style (the project after adding Walk, Idle and Attack actions) | |
| Unit 6 | Walking, Idling and Attacking with Joystick Controls Tutorial | |
| Unit 7 | Virtual Joystick - Project 4 - Side Scroller Style (Jumping Added / Finished) | |
| Unit 8 | Jumping with Joystick Controls Introduction | |
| Unit 9 | Jumping with Joystick Controls Tutorial | |
| Module 7 | Aim and Release (Sling Shot style) Controls | |
| In this iOS video tutorial we will modify the previous Joystick Project (Project #2, the first one with a Side Scroller setup) to sling a character forward from a set position in an aim and release fashion. Ahem, think, Angry Birds. We will also look at how to add the character and platforms into a "worldNode" which will get moved as the character is slung so it doesn't go out of view. | ||
| Unit 1 | Sling Shot Project | |
| Unit 2 | Sling Shot Style Controls Tutorial | |
| Module 8 | Isometric Controls with a Joystick and Directional Pad | |
| In these two iOS video tutorials we will modify our joystick controls to work with an isometric level and then convert that project to use a virtual directional pad instead. | ||
| Unit 1 | Isometric Projects (Joystick and Directional Pad) | |
| Unit 2 | Isometric Controls Tutorial | |
| Unit 3 | Isometric Controls Tutorial with a Directional Pad | |

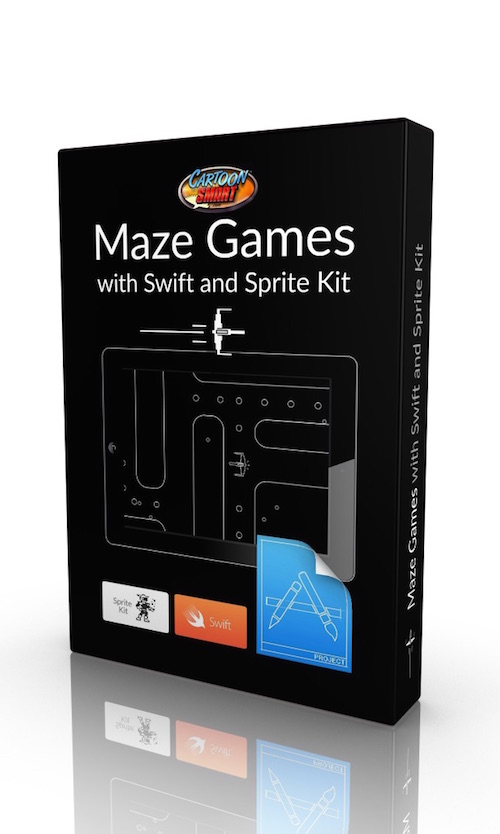
iOS Maze Games with Swift and Sprite Kit (updated projects for Swift 3) - Subscription Access
Learn Swift and Sprite Kit while creating a fun Pac-man style maze game.
| Module 1 | Creating a Hero for the Maze | |
| In this series of videos, we will focus on the initial setup and creating our maze runner character. | ||
| Unit 1 | Maze Game - Xcode Projects | |
| Unit 2 | Maze Games with Swift and Sprite Kit - Introduction to the Series | |
| Unit 3 | Maze Games with Swift and Sprite Kit - Initial Setup | |
| Unit 4 | Maze Games with Swift & Sprite Kit - Adding the Hero Class | |
| Unit 5 | Maze Games with Swift and Sprite Kit - Moving the Hero | |
| Unit 6 | Maze Games with Swift and Sprite Kit - Gestures and Animations | |
| Unit 7 | Maze Games with Swift and Sprite Kit - Hero Physics | |
| Module 2 | Boundaries, Contacts, Tiled and Star Classes | |
| In this series of videos, we will add boundaries, use Sprite Kit's contact listeners, construct levels using Tiled, and much more. | ||
| Unit 1 | Maze Games with Swift and Sprite Kit - Introduction to Session 2 | |
| Unit 2 | Maze Games with Swift and Sprite Kit - Create the Maze Boundaries from SKS files | |
| Unit 3 | Maze Games with Swift and Sprite Kit - Contact Delegate | |
| Unit 4 | Maze Games with Swift and Sprite Kit - Tiled Intro | |
| Unit 5 | Maze Games with Swift and Sprite Kit - Parsing the XML data of the Tiled File | |
| Unit 6 | Maze Games with Swift and Sprite Kit - Centering the Hero | |
| Unit 7 | Maze Games with Swift and Sprite Kit - Creating the Star Class (pt1) | |
| Unit 8 | Maze Games with Swift and Sprite Kit - Creating the Star Class (pt2) | |
| Module 3 | Sensing Walls and Adding Enemies | |
| Now we will focus on adding sensors for limiting / allowing movement in particular directions within the maze and add our Enemy class. | ||
| Unit 1 | Maze Games with Swift and Sprite Kit - Intro to Session 3 | |
| Unit 2 | Maze Games with Swift and Sprite Kit - Adding Sensor Nodes to the Hero | |
| Unit 3 | Maze Games with Swift and Sprite Kit - Using the Sensor Nodes | |
| Unit 4 | Maze Games with Swift and Sprite Kit - Edge of the World | |
| Unit 5 | Maze Games with Swift and Sprite Kit - Placing the Enemies | |
| Unit 6 | Maze Games with Swift and Sprite Kit - Moving the Enemies | |
| Unit 7 | Maze Games with Swift and Sprite Kit - Refining the Enemy Movements | |
| Unit 8 | Maze Games with Swift and Sprite Kit - Reloading the Level | |
| Module 4 | Property List, Loading the Next Level, Text, Sounds and More | |
| This section we will really finish up our game by including a Property list, advance levels, add supplemental text, sounds and more. | ||
| Unit 1 | Maze Games with Swift and Sprite Kit - Intro to Session 4 | |
| Unit 2 | Maze Games with Swift and Sprite Kit - Using a Property List for the Hero's Settings | |
| Unit 3 | Maze Games with Swift and Sprite Kit - Using a Property List for the Game Settings | |
| Unit 4 | Maze Games with Swift and Sprite Kit - Using a Property List with an Array of Levels | |
| Unit 5 | Maze Games with Swift and Sprite Kit - Loading the Next Level | |
| Unit 6 | Maze Games with Swift and Sprite Kit - Adding a Lives Left Label | |
| Unit 7 | Maze Games with Swift and Sprite Kit - Parallax Background | |
| Unit 8 | Maze Games with Swift and Sprite Kit - Adding Sounds | |
| Module 5 | Easy extensions with the final project | |
| This section we will look at some easy tweaks to extend the game. | ||
| Unit 1 | Maze Games with Swift and Sprite Kit - Pushable Boundaries | |
| Unit 2 | Maze Games with Swift and Sprite Kit - Using Stars to Auto Advance Level | |
Learning Swift - Short / Standalone Topics
A variety of short Swift courses. Feel free to suggest topics!
| Module 1 | One-Off Topics | |
| A variety of Swift topics. | ||
| Unit 1 | Path and SKShapeNode Based Swipe Lines | |
| Unit 2 | Fruit Ninja-Style Swipe Lines with Swift and SpriteKit | |
| Unit 3 | Upgrading from Swift 3 to Swift 4 | |
| Unit 4 | Device Specific SKScene files | |
| Unit 5 | Swift 4 and JSON | |
| Unit 6 | How to Split SKLabelNodes into 2 Lines with Swift | |
| Unit 7 | Loading a Property List from a Server using Swift 4 | |
| Unit 8 | How to Check Values Periodically with Swift and Sprite Kit | |
| Unit 9 | Swift Code for Opening Restricted or Unrestricted URLs from Sprite Kit | |
| Unit 10 | Basic Swift for a Slot Machine Game (has some good random value code) | |
| Module 2 | Asteroids with Swift and Sprite Kit | |
| In this series of video tutorials we'll use Sprite Kit and Swift to program an Asteroids style game. This is perfect beginner course for anyone new to iOS development | ||
| Unit 1 | Part 1 - Rotation and Tap Gestures for Ship Controls | |
| Unit 2 | Part 2 - Firing Bullets | |
| Unit 3 | Part 3 - The Actual Asteroids | |
| Unit 4 | Part 4 - The Physics | |

Swift Basics for Game Developers - Lifetime Access
Jumpstart your knowledge of Swift 2, SpriteKit and Xcode 7 with this simple, quickly-paced series of lessons. In just 90 minutes, you'll be tossing around physics-based objects in a SpriteKit based project, ready to start production on your first game or app.
Also included are all of our Swift 1.0 and Sprite Kit video tutorials.
| Module 1 | Swift 2 Basics | |
| These first five video tutorials will teach you how to get setup in Xcode, and start programming with Swift right away. To get the most of it, you should be using Xcode 7 (or higher) and programming in Swift 2 (although Swift 1.2 would be fine as well). We'll talk about basic programming concepts in Swift 2, such as variables, functions, optionals, arrays, and dictionaries. | ||
| Unit 1 | Swift 2.0 Basics Tutorials - Variables and Optionals | |
| Unit 2 | Swift 2.0 Basics Tutorials - Functions - Parameters and Returning Values | |
| Unit 3 | Swift 2.0 Basics Tutorials - Enum Types and Swift Statements | |
| Unit 4 | Swift 2.0 Basics Tutorials - Iterating through Arrays | |
| Unit 5 | Swift 2.0 Basics Tutorials - Iterating through Dictionaries to look up keys and values | |
| Module 2 | Swift 2 and Sprite Kit | |
| In this series of video tutorials we will discuss Swift 2 as it applies to Sprite Kit. Topics include using SKSpriteNodes, safely casting types, subclassing, physics bodies, SKCameraNodes, SKActions, detecting SKPhysicsContacts and more. | ||
| Unit 1 | Swift 2.0 and SpriteKit Basics - Importing Images and Safely Casting SKNodes and SKSpriteNodes | |
| Unit 2 | Swift 2.0 and SpriteKit Basics - Enumerating through all child nodes (even SKReferenceNodes) | |
| Unit 3 | Swift 2.0 and SpriteKit Basics - Subclassing using the Custom Class Inspector in Xcode 7 | |
| Unit 4 | Swift 2.0 and SpriteKit Basics - Introduction to Physics and tracking with SKCameraNodes | |
| Unit 5 | Swift 2.0 and SpriteKit Basics - SKActions and the especially useful RunBlock action | |
| Unit 6 | Swift 2.0 and SpriteKit Basics - Detecting physics collisions with SKPhysicsContact | |
| Unit 7 | Swift 2 and SpriteKit Basics - Demo Project | |
| Module 3 | Swift 1.0 Basics - Video Tutorials | |
| In this series of video tutorials, Justin Dike teach some of the basic things you can do with Swift in Xcode. If you’re completely new to programming or just need a little refresher, this is a great starter tutorial series. | ||
| Unit 1 | Swift Basics - Part 1 - Xcode First Timers | |
| Unit 2 | Swift Basics - Part 2 - Variables, Optionals and Forced Unwrapping | |
| Unit 3 | Swift Basics - Part 3 - Functions | |
| Unit 4 | Swift Basics - Part 4 - If Statements | |
| Unit 5 | Swift Basics - Part 5 - Enumerations | |
| Unit 6 | Swift Basics - Part 6 - Arrays, Dictionaries, and For Loops | |
| Unit 7 | Swift Basics - Part 7 - Classes and Structs | |
| Unit 8 | Swift Basics - Part 8 - Classes Continued | |
| Unit 9 | Swift Basics - Part 9 - Subclasses | |
| Module 4 | Learn as I Learn – Sprite Kit & Swift 1.0 Video Tutorials | |
| In this video tutorial series, you can learn right along with Justin Dike during his first week using Swift with Sprite Kit. Although, Justin is very comfortable with Sprite Kit, these videos were recorded over his first 5 days with Swift, so this series is a bit more off-the-cuff, experimental, and reveals some of his initial “ah-ha” moments with the language. | ||
| Unit 1 | Day 1 - Learning Swift and Sprite Kit - The Starting Project | |
| Unit 2 | Day 2 - Learning Swift and Sprite Kit - Early Physics Look | |
| Unit 3 | Day 3- Learning Swift and Sprite Kit - Part 1 Enum Types | |
| Unit 4 | Day 3 - Learning Swift and Sprite Kit - Part 2 - Update Function | |
| Unit 5 | Day 4 - Learning Swift and Sprite Kit - Initialize with a Dictionary, For Loops and More Physics | |
| Unit 6 | Day 5 - Learn Swift and Sprite Kit - Physics Contact Listeners | |
Role Playing Games with Sprite Kit and Objective C - Subscription Access
In this series of lessons on Sprite Kit, we will create a physics-based world with a roaming hero that can collide with other heroes (and make them follow the leader). Nearly everything will be property-list driven and adjustable by changing text in a plist file. We will program an option for each character to include / exclude front animations, side animations or back animations. We will also make each character attack, emit particles, receive damage, have a health meter, advance levels, restart levels and much, much more! All using Xcode and Sprite Kit.
| Module 1 | Introduction to the RPG World | |
| Learn how to create a physics based world. | ||
| Unit 1 | Role Playing Games - Course Assets | |
| Unit 2 | Introduction | |
| Unit 3 | Initial Setup | |
| Unit 4 | Creating the Physics-Based World | |
| Unit 5 | Creating the Physics-Based World Continued | |
| Module 2 | Property Lists, Debug Borders, Gestures & More | |
| We will continue building the game by setting up boundaries, other characters and working with a property list. | ||
| Unit 1 | Using the Property List Data | |
| Unit 2 | Adding Debug Boundaries for the Physics Objects | |
| Unit 3 | Adding Gesture Recognizers to the Sprite Kit View | |
| Unit 4 | Bringing in Other Characters from the Property List | |
| Module 3 | Follow the Leader | |
| In these videos we will work toward making a leader and following characters. | ||
| Unit 1 | Initial Directional Movements | |
| Unit 2 | Delayed Followers | |
| Unit 3 | Stopping the Characters | |
| Unit 4 | Enabling Characters on Contact with the Leader | |
| Module 4 | Textures for Front, Back and Side Views | |
| He will add various views to each character based on where they move. | ||
| Unit 1 | Setting up the rest of the Property List | |
| Unit 2 | SKActions for Changing the Textures of the Character | |
| Unit 3 | Running the SKActions for Front, Back and Side view Walk Sequences | |
| Unit 4 | SKActions for Attacking | |
| Module 5 | Particles, Health Meters, and Receiving Damage | |
| We will continue building the game environment by adding particles, health meters and more. | ||
| Unit 1 | Particle Emitters | |
| Unit 2 | Health Meters and Receiving Damage | |
| Unit 3 | Game Over | |
| Unit 4 | Switching Leader Order | |
| Module 6 | Instruction Text, Bouncing Off Walls & More | |
| We will finish off the game by tackling the topics below. | ||
| Unit 1 | Fading Instruction Text | |
| Unit 2 | Bouncing Back From Wall Contact and Flaming to Death | |
| Unit 3 | Collecting Coins | |
| Unit 4 | Advancing Levels | |
| Unit 5 | Alternate Property List Locations | |
| Unit 6 | Resizing the Entire SKScene | |
| Unit 7 | Creating an SKLabelNode for Stats | |
| Unit 8 | Applying Physics Force and Impulses to Scatter Coins | |

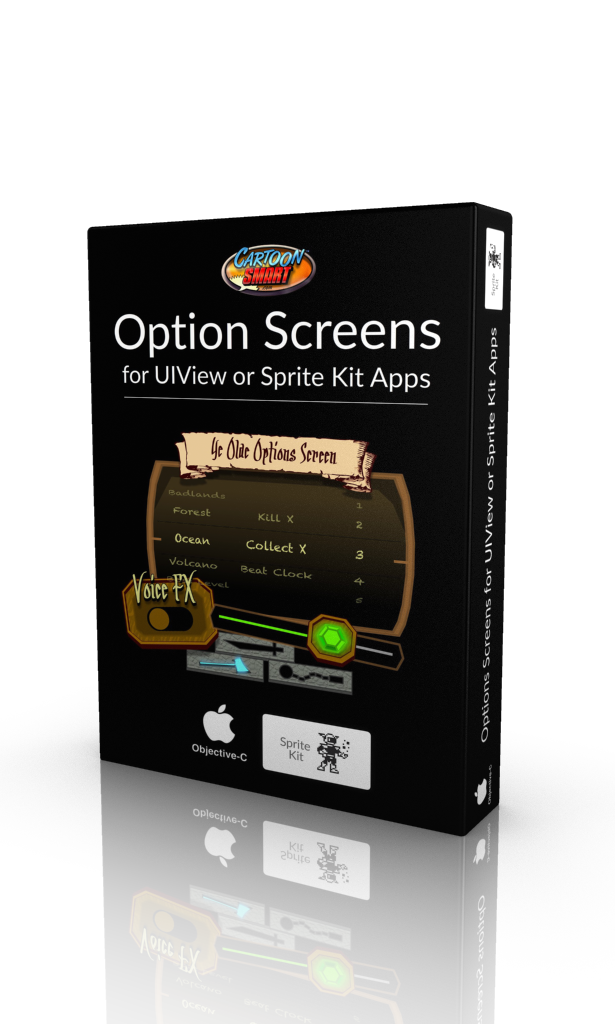
Option Screens for both UIView or Sprite Kit Apps - Subscription Access
In this tutorial, we will focus entirely on creating an Options screen, using a Single View Application or Sprite Kit based project. We’ll create UISwitches, UIButtons, UISliders, UISegmentedControls, groups of buttons that act like segmented controls, and finally, a UIPickerView. Picker views can be made up of single or multiple columns of “spin-able” data. For example, Apple’s Clock app has a Timer function made up of a double column UIPickerView.
| Module 1 | Introduction and Initial Setup | |
| In this first session we will work on opening and closing new UIView or Sprite Kit scenes. | ||
| Unit 1 | Option Screens Tutorial - Art Assets and Xcode Projects | |
| Unit 2 | Introduction | |
| Unit 3 | AppData Singleton | |
| Unit 4 | Creating the Options Screen | |
| Unit 5 | Using a UIButton to Launch the Options Screen | |
| Unit 6 | Opening and Closing the Option Screen | |
| Unit 7 | NSTimer / SKAction for Fading and Tinting | |
| Module 2 | UISwitches, UISliders, UISegmentedControls and UIButtons | |
| The title of this section about sums it up. Each video will explore adding one of these elements to the screen. | ||
| Unit 1 | UISwitches | |
| Unit 2 | UISliders | |
| Unit 3 | UISegmentedControls | |
| Unit 4 | UIButton Groups | |
| Module 3 | UIPickerViews | |
| In this series of videos we will create single, double and triple picker views and discuss how to interconnect them. | ||
| Unit 1 | Introduction to using a One Wheel Picker View | |
| Unit 2 | Create a Single Column UIPickerView | |
| Unit 3 | Using a Property List to Populate the UIPickerView Wheel | |
| Unit 4 | Switching to Three Component Wheels | |
| Unit 5 | Spinning to Default Values Based on the Property List | |
| Unit 6 | Interconnecting the Three Wheels | |
| Unit 7 | Testing from the Main Class for a Change in the UIPickerView | |
| Unit 8 | Return to Game Button | |
| Module 4 | NSUserDefaults and NSNotifications | |
| In the first video, we will save our variables to the standard NSUserDefaults, and use them to retain those same preferences even if the app is closed and restarted. In the final tutorial, we will quickly look at NSNotifications as an alternate means of alerting classes to a preference change (and passing NSObjects between classes via the notification). | ||
| Unit 1 | NSUserDefaults | |
| Unit 2 | NSNotifications | |
In-App Purchasing for iOS Apps using Consumable or Non Consumable Products - Subscription Access
If you want a step-by-step understanding of how to create an InAppManager and InAppObserver class, this is the course for you!
If you don’t care about creating those classes from scratch and just want to jumpstart into using in-app purchases, this is ALSO the course for you. You’re welcome to skip ahead to the Quick Start guide (and copy our InAppManager and InAppObserver classes). You can begin testing purchases or creating an in-game money system within an hour.
Included with the tutorial movies are two source projects, one uses the Sprite Kit template and another uses the starting template for Single View Application. These projects alone make for a valuable reference, but you’ll get three hours of tutorials explaining every detail!
| Module 1 | iTunes Connect Setup and Provisioning | |
| An introduction to this tutorial on consumable and non-consumable purchases and how to initially set them up in iTunes Connect. | ||
| Unit 1 | In App Purchasing Tutorial - Course Assets | |
| Unit 2 | iTunes Connect Setup | |
| Unit 3 | Provisioning Profiles | |
| Unit 4 | Creating an iTunes Connect Test User | |
| Unit 5 | Initial Xcode Setup | |
| Unit 6 | Two Paths to Go From Here | |
| Module 2 | Writing the In-App Purchasing Classes | |
| In this section we write each class from scratch! Lucky for you this is completely optional if you just want to get started integrating them into your project, you can skip to the next section. | ||
| Unit 1 | Initializing the InAppManager Class | |
| Unit 2 | Requesting Product Data | |
| Unit 3 | The InAppObserver Class | |
| Unit 4 | The Buy Products and Provide Content Methods | |
| Unit 5 | Failed and Restored Transactions | |
| Module 3 | Quick Start Guide to using the In-App Purchase Classes | |
| In these videos we will import the classes written last section and begin testing them. As of iOS8 you will need to test on your actual device (not the Simulator)! | ||
| Unit 1 | Adding the (pre-written) InAppManager and InAppObserver Classes to your project | |
| Unit 2 | Adding More Product ID’s to Purchase | |
| Unit 3 | Adding UIButtons to Purchase and Getting NSNotification feedback | |
| Unit 4 | Setting Different Button Values for the iPhone and iPad | |
| Unit 5 | Using a UIView for the UIButtons | |
| Module 4 | What To Do After a Purchase | |
| In these videos we will look at creating an in-game monetary system and look at Restoring Purchases (which is required by Apple). | ||
| Unit 1 | Creating an In-Game Monetary System | |
| Unit 2 | Don’t Forget the Restore Button | |
| Unit 3 | About The Source Projects | |

Using AWS DynamoDB with Swift 4
Learn how to quickly incorporate databases into your Swift based iOS apps.
| Module 1 | AWS DynamoDB Basics | |
| ... | ||
| Unit 1 | Initial Setup with DynamoDB | |
| Unit 2 | Add AWS Mobile SDK using Cocoapods | |
| Unit 3 | Adding a High Score Table | |
| Unit 4 | Querying for an Existing Score | |
| Unit 5 | Getting Top Scores by Country | |

iOS Game Programming With Xcode and Cocos2d - Subscription Access
Justin Dike, professional instructor and founder of CartoonSmart.com, wrote and illustrated iOS Game Programming with Xcode and Cocos2d. The book features: high resolution images, interactive galleries, screencasts, and color coded examples. Imagine seeing video examples of EXACTLY what your code should be doing at certain times!
| Module 1 | The Book and Resources | |
| Downloadable below.... | ||
| Unit 1 | iOS Game Programming with Xcode and Cocos2d - The Book | |
| Unit 2 | Resources | |

iOS App Development with Cocos2d - Subscription Access
This lengthy, 20 plus hour series teaches Xcode, Objective-C and Cocos2d. You'll learn how to create a flip-book style app, wave attack game, work with Game Center to set Achievements and Score boards, enable In-App purchasing, use the Box2d physics engine, create a Pac-Man style maze game, and all the fundamentals that go along with these topics, such as Singletons, Animation, Audio, Property Lists, Custom Fonts, etc. This course is a few years old, but don't write it off as too old to learn from, as there's plenty that still holds true today.
| Module 1 | The Basics of Xcode and Cocos2D - 2 hrs | |
| Introductions and Fundamentals. | ||
| Unit 1 | All Projects | |
| Unit 2 | Introduction to the Series | |
| Unit 3 | Installing XCode and Cocos2d | |
| Unit 4 | Differences between the Cocos2d v1 and Cocos2d v2 template | |
| Unit 5 | Quick Xcode Tour and Adding Sources to Your Project. | |
| Unit 6 | So what is this App you will be building? | |
| Unit 7 | App Identifiers and Provisioning Profiles | |
| Unit 8 | Cocos2D basics, importing images, CCSprite properties, scheduling methods. | |
| Unit 9 | Accelerometer, touch events, CCActions. | |
| Unit 10 | Xcode5 Image Assets | |
| Module 2 | Singletons & Building a Flip Book App - 2 hrs. | |
| Learn how to create a children's book, comic book, photography gallery, reference guide-type app. | ||
| Unit 1 | Introducing the Book Project and Notes | |
| Unit 2 | Buttons, Menus, Singleton Classes, Transitioning Scenes/Layers. | |
| Unit 3 | Adding In-App purchasing, unlocking content, NSUserDefaults, and restoring past purchases. | |
| Module 3 | Animation, Audio, Custom Fonts - 4 hours | |
| Topics include: animated sprites with Cocos2D, writing a custom animation class, sprite sheet animations, adding effects and background sound with the Simple Sound Engine, using your own fonts to make a score label in Cocos2D and creating a wave attack game. | ||
| Unit 1 | Animated sprites with Cocos2D. | |
| Unit 2 | Writing a custom animation class with Cocos2d | |
| Unit 3 | Sprite sheet animations with Cocos2d | |
| Unit 4 | Adding effects and background sound with the Simple Sound Engine | |
| Unit 5 | Using your own fonts to make a score label in Cocos2D | |
| Module 4 | Create a Wave Attack Game | |
| Build a "target practice" app by setting up a Player Class, bullets, and detect radial or rectangular collisions. Continue the project by creating a wave attack game with Enemy classes, ammo drops, game menus, and much more. | ||
| Unit 1 | Build a Target Practice App | |
| Unit 2 | Wave Attack Part 1 | |
| Unit 3 | Wave Attack Part 2 | |
| Module 5 | Working with Box2D, a Physics Engine - 7 hrs. | |
| This section teaches physics basics ultimately leading up to creating a Pac-Man style maze game. | ||
| Unit 1 | The Box2D template explained. | |
| Unit 2 | Modify the template to be Retina Display capable | |
| Unit 3 | Drop ninjas into the Box2d world | |
| Unit 4 | Create a custom Box2d class for Ninajs | |
| Unit 5 | Using Box2D sensors and ContactListeners for Pac-Man style maze game | |
| Module 6 | Game Center, Leaderboards, Achievements - 4 hrs. | |
| We look at everything it takes to get your app setup for Game Center integration. We'll talk about what needs to be done in iTunes Connect to setup an empty leaderboard and a new achievement goal for players. | ||
| Unit 1 | Setup a fighting game style project to work with Game Center | |
| Unit 2 | Game Center Introduction | |
| Unit 3 | Game Center Wrap Up and Review | |
| Module 7 | Property Lists | |
| This first video will introduce you to using Property Lists with Cocos2d (or any Xcode project). We'll create a blank one to start, compare the file type in both Xcode and Text Edit, then begin pulling properties into our test app. In the second video, we will look at some practical uses of the Property List, for example, how they could be used to populate different levels, define image files, and other variables. | ||
| Unit 1 | Property Lists - Part 1 | |
| Unit 2 | Property Lists - Part 2 | |

Art
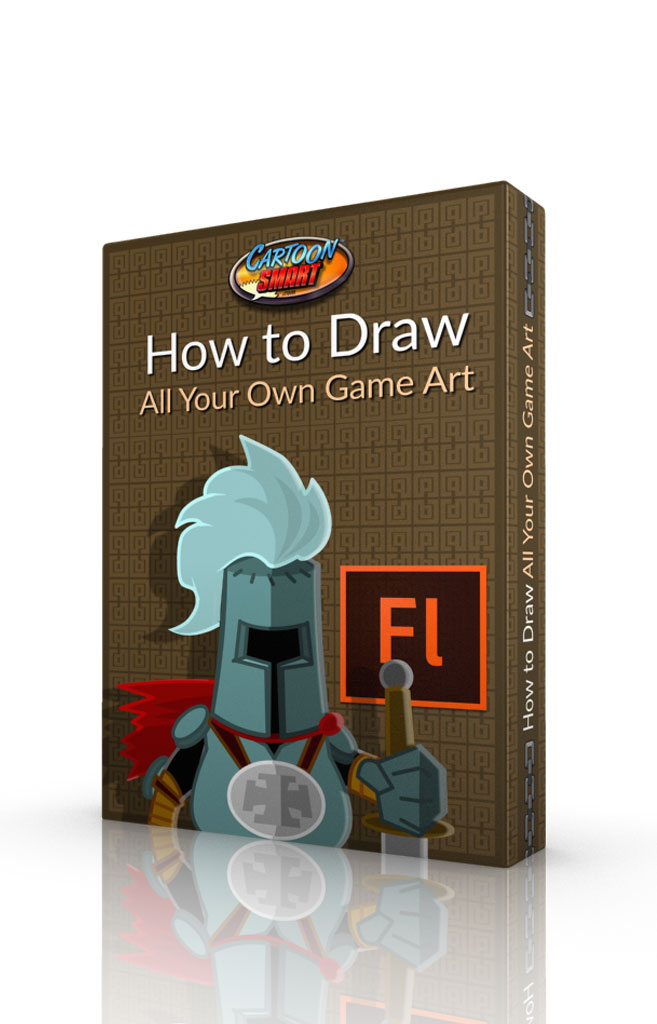
How to Draw All Your Own Game Art - Subscription Access
Imagine being able to see a style of art or reference image and already knowing the steps to recreate something similar. That’s the true aim of this course. The wide range of topics in the course should make you feel confident enough to try illustrating any aspect of your game, be it the logo, hero, background or interface. We’ll even cover animation and discuss tips to exporting image sequences specifically for games.
| Module 1 | Flash Basics | |
| We'll cover the initial setup in Flash and discuss manipulating vector points. | ||
| Unit 1 | How to Draw All Your Own Game Art - Course Assets | |
| Unit 2 | Initial Setup with Adobe Animate or Adobe Flash | |
| Unit 3 | Vector Points | |
| Module 2 | The All-Important Logo | |
| In this section, we’ll look at some incredibly easy tips you can use with just about any font to make your logo stand out. Your logo is one of the first things people will see in the game itself, but more importantly, potential players will scrutinize any preview screenshots in the store before downloading your game. This first impression could be the key to people downloading your app or not. | ||
| Unit 1 | Logos - Basic Layout | |
| Unit 2 | Logos - Starting the Empire Logo | |
| Unit 3 | Logos - Coloring | |
| Unit 4 | Logos - Adding a Backing | |
| Unit 5 | Logos - Adding Lighting | |
| Module 3 | Ye ol’ Quest Map | |
| Alright matey’s, no one knows where to begin their journey without a map. This could be used as a guide to give players an overview of the various levels they will travel to. Or you could simply create a map for decoration in conjunction with your logo. Maps can be a great, soft background piece behind text, or other user interface elements. | ||
| Unit 1 | Quest Map - Starting Out | |
| Unit 2 | Quest Map - Streams and Docks | |
| Unit 3 | Quest Map - Mountains and Roads | |
| Unit 4 | Quest Map - Forests and Cliffs | |
| Unit 5 | Quest Map - Adding a Village | |
| Module 4 | Interface Elements and Buttons | |
| In this session, we’ll be covering many types of interface elements, or GUI. This will include buttons, progress bars, selection icons, radar, and anything else you might find while playing the game or within a menu. | ||
| Unit 1 | GUI - Introduction | |
| Unit 2 | GUI - Creating a Play Button | |
| Unit 3 | GUI - Creating a Sci-Fi Style Play Button | |
| Unit 4 | GUI - Progress Bar | |
| Unit 5 | GUI - Adding Chains and Drawing a Compass Radar | |
| Unit 6 | GUI - Selected Icon | |
| Unit 7 | Space Style Buttons | |
| Unit 8 | Overview of Finished GUI | |
| Module 5 | Designing Game Characters | |
| In this session we’ll tackle drawing your main character. We’ll practice drawing the in-game views (front, back and side) and more detailed closeup views for Selection Screens, App icons or Promotional Art. | ||
| Unit 1 | "Choose a Character" Screen Part 1 | |
| Unit 2 | "Choose a Character" Screen Part 2 | |
| Unit 3 | Drawing an In-Game Character - Front View | |
| Unit 4 | Drawing an In-Game Character - Back View | |
| Unit 5 | In Game Character Side View | |
| Module 6 | Character Animations | |
| In this session you’ll learn how to animate your character from the previous session. We’ll look at front and side view walking animation, an attack animation, how to add an interesting attack effect, and how to export a PNG sequence or Sprite Sheet from Flash. | ||
| Unit 1 | Animating a Front View Walk Cycle | |
| Unit 2 | Animating a Side View Walk Cycle | |
| Unit 3 | Animating an Attack Animation | |
| Unit 4 | Adding FX to an Attack Animation | |
| Unit 5 | How to Export from Flash | |
| Module 7 | Terrain | |
| In this session we will construct various top-down view terrains. Combined with the buildings and structures taught in the next session, you’ll have some very detailed backgrounds to work with. | ||
| Unit 1 | Drawing Terrain - The Outlands | |
| Unit 2 | Drawing Terrain - The Outlands Continued | |
| Unit 3 | Drawing Terrain - The Ocean | |
| Unit 4 | Drawing Terrain - The Ocean Continued | |
| Unit 5 | Drawing Terrain - The Bad Part of Anywhere | |
| Unit 6 | Drawing Terrain - The Bad Part of Anywhere Continued | |
| Module 8 | How to Draw Buildings | |
| In this session we will cover perspective points, sketching ideas for buildings and creating multiple different structures, as usual using Adobe Flash. You’ll learn how to draw a castle, tiki house, and modular style buildings which are great for filling larger background pieces with very little art. | ||
| Unit 1 | Perspective 101 | |
| Unit 2 | The Castle | |
| Unit 3 | Modular Huts | |
| Unit 4 | Sketching Ideas | |
| Unit 5 | The Tiki House | |
| Module 9 | Animation FX | |
| In this session we will look at explosion FX which you could use for collisions, impacts, death sequences, etc. We will also practice animating looping effects to use in a background sequence. Great for adding a little extra life to your game’s scenes. | ||
| Unit 1 | Star Burst Animation | |
| Unit 2 | Ring Blast Animation | |
| Unit 3 | Animating a Smoke Effect | |
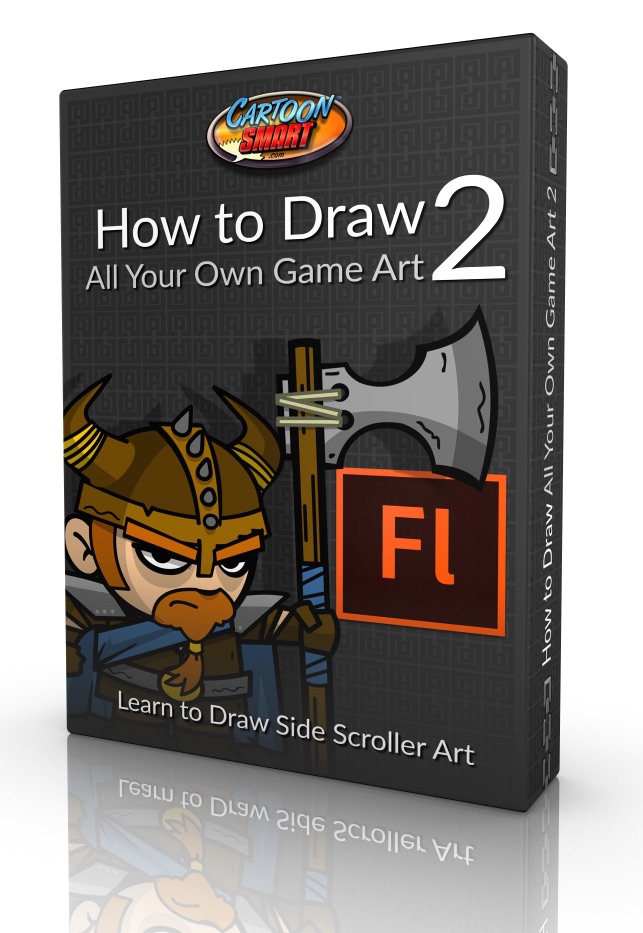
How to Draw All Your Own Game Art 2 - Subscription Access
The long awaited sequel to our popular game art tutorial series. This new course won't assume any knowledge from the last, so new learners can jump right into this series! The theme this time around: Side Scrolling Art!
| Module 1 | Drawing Your First Side Scrolling Character | |
| In this series of videos we'll draw a side scrolling character from scratch in Adobe Flash. | ||
| Unit 1 | Course Assets | |
| Unit 2 | How to Draw a Side Scroller Character - Initial Setup | |
| Unit 3 | How to Draw a Side Scroller Character - Head and Eyes | |
| Unit 4 | How to Draw a Side Scroller Character - Shading and Noses | |
| Unit 5 | How to Draw a Side Scroller Character - Facial Hair and Ears | |
| Unit 6 | How to Draw a Side Scroller Character - Helmet pt 1 | |
| Unit 7 | How to Draw a Side Scroller Character - Helmet pt 2 | |
| Unit 8 | How to Draw a Side Scroller Character - Body and Arms | |
| Unit 9 | How to Draw a Side Scroller Character - Legs and Cloak | |
| Unit 10 | How to Draw a Side Scroller Character - The Axe | |
| Unit 11 | How to Draw a Side Scroller Character - Wrap Up | |
| Module 2 | Animating a Typical Side - Scrolling Character | |
| In this series of videos we will animate the character we drew in the previous section, export the character, look at creating sprite sheets, texture atlases, batch renaming sequential files and creating animation templates for reusing keyframes / sequences with similar characters. | ||
| Unit 1 | Animating a Side Scroller Character - Initial Setup | |
| Unit 2 | Animating a Side Scroller Character - Walk Cycle | |
| Unit 3 | Animating a Side Scroller Character - Template Considerations | |
| Unit 4 | Animating a Side Scroller Character - Creating an Animated Template | |
| Unit 5 | Animating a Side Scroller Character - Resolve Library Conflicts | |
| Unit 6 | Animating a Side Scroller Character - Animating a Run Cycle | |
| Unit 7 | Animating a Side Scroller Character - Swap Symbols vs Find and Replace | |
| Unit 8 | Animating a Side Scroller Character - Bright Idea? Leaving Notes | |
| Unit 9 | Animating a Side Scroller Character - Jump Animation | |
| Unit 10 | Animating a Side Scroller Character - Dazed or Hurt Animation | |
| Unit 11 | Animating a Side Scroller Character - Attack Animation | |
| Module 3 | How to Illustrate a Typical Side Scroller Level | |
| In these videos you will learn how to create platform art for a typical side-scrolling game. We will look at ground tiles, backgrounds, scenery, various objects and more! | ||
| Unit 1 | Side Scroller Platform Art Tutorial - Ground Tiles | |
| Unit 2 | Side Scroller Platform Art Tutorial - Underground Tiles | |
| Unit 3 | Side Scroller Platform Art Tutorial - Background and Foreground Elements | |
| Unit 4 | Side Scroller Platform Art Tutorial - Clouds | |
| Unit 5 | Side Scroller Platform Art Tutorial - 2D and 3D-ish Pipes! | |
| Unit 6 | Side Scroller Platform Art Tutorial - Blocky Platforms | |
| Unit 7 | Side Scroller Platform Art Tutorial - Rocky or Organic Platforms | |
| Unit 8 | Side Scroller Platform Art Tutorial - How to Draw Backgrounds | |
| Unit 9 | Side Scroller Platform Art Tutorial - Using Repeating Shapes to Draw Backgrounds | |
| Module 4 | Pick Up Items / Icons | |
| In these video tutorials we'll look at how to draw pickup-items on a level (things like hearts, gears, dynamite, etc) and then look at creating more traditional icons for GUI. | ||
| Unit 1 | How to Draw In-Game Pickup Items or Icons - Hearts / Gears | |
| Unit 2 | How to Draw In-Game Pickup Items or Icons - Radioactive Gas Mask Icon | |
| Unit 3 | How to Draw In-Game Pickup Items or Icons - Dynamite | |
| Unit 4 | How to Draw In-Game Pickup Items or Icons - GUI | |
| Module 5 | Varying Styles of Character Art (miscellaneous videos) | |
| In this section we will explore different styles of art. | ||
| Unit 1 | Block Style Character | |
| Unit 2 | Space Invader-ish Character or Icon | |
How to Draw Giant Robots
A 10 Hour Flash Animation Tutorial
| Module 1 | How to Draw Giant Robots – Course Assets | |
| Download all the Flash files for this course | ||
| Unit 1 | Course Assets | |
| Module 2 | Polygon Shape Design | |
| This first session is a soft-approach to getting started with Adobe Flash and vector illustration in general. If you’ve never used Flash before, be sure to watch the initial setup video. Otherwise, you can begin by creating simple polygon shapes, which we extrude to create more complex shapes. We’ll also talk about perspective and create a quick body pose to use in Session 2. | ||
| Unit 1 | Initial Setup with Adobe Flash | |
| Unit 2 | Basic Shapes | |
| Unit 3 | Extruding Shapes | |
| Unit 4 | Complex Shapes | |
| Unit 5 | Body Mockup | |
| Module 3 | Shading and Texturing Practice | |
| This session teaches how to save a color palette in Flash, color a three-dimensional object, texture using masks and images, add rust and smoke fx, and more. | ||
| Unit 1 | Color Palette | |
| Unit 2 | Elaborating the Shoulder Parts | |
| Unit 3 | Initial Color and Texture | |
| Unit 4 | Rust and Smoke | |
| Unit 5 | Detailing | |
| Module 4 | Parts Library | |
| In this session, we will build up a library of symbols which we can use throughout the rest of the course and in future projects. Keeping an archive of past “parts” will help you to speed through production on your next robot masterpiece. | ||
| Unit 1 | Cords | |
| Unit 2 | Metal Clumps | |
| Unit 3 | Repeating Columns | |
| Unit 4 | Paint Chips | |
| Unit 5 | Atmospheric FX | |
| Unit 6 | Insignia | |
| Unit 7 | Gears | |
| Module 5 | Silhouetting and Adding Primary Planes to the Final Piece | |
| It’s time to begin your epic robot masterpiece. This session will teach you how to use parts from your library and build the silhouette of your robot-to-be. Then we’ll carefully begin adding one-dimensional polygon planes to the robot. Our aim is to simply get a solid foundation for the finished piece. | ||
| Unit 1 | Using the Parts Library to Build a Silhouette | |
| Unit 2 | The Exoskeleton | |
| Unit 3 | The Exoskeleton – Primary Planes | |
| Unit 4 | The Exoskeleton – Primary Planes (continued) | |
| Unit 5 | Touching Up | |
| Module 6 | Extruding Planes for the Exoskeleton | |
| In this session we’ll begin extruding the primary planes we created last session and build the robot’s entire exoskeleton, or outer armor, with special attention to both design and functionality. | ||
| Unit 1 | Extruding the Legs | |
| Unit 2 | Extruding the Boots | |
| Unit 3 | Extruding the Chest Plates | |
| Unit 4 | Extruding the First Arm | |
| Unit 5 | Extruding the Second Arm | |
| Unit 6 | Extruding the Shoulders | |
| Unit 7 | Extruding the Neck and Head | |
| Module 7 | Embellishing the Exoskeleton | |
| This session we’ll add lights, vents, divides in the armor, chip away at the edges, insignia, bolts, piping and just about everything else we need before we send our robot off to the next session for final shading. | ||
| Unit 1 | Lights | |
| Unit 2 | Dividing Areas | |
| Unit 3 | Thin Lines for Panelling | |
| Unit 4 | Rough Edging | |
| Unit 5 | Adding Pipes | |
| Unit 6 | Insignia and Bolts | |
| Module 8 | Adding Realism to the Final Piece | |
| In this final session we will concentrate on giving our robot realistic shading and atmosphere. We’ll add a background layer, then shade each region of the body accordingly. We’ll add smoke effects, damage, debris and even some helicopter fire. Finally, we can export a high resolution image, open it in Photoshop and add watercolor effects to make the image have a painterly, movie poster feel. | ||
| Unit 1 | Shading | |
| Unit 2 | Lighting and Filters | |
| Unit 3 | Textures | |
| Unit 4 | Debris and Smoke | |
| Unit 5 | Adding some optional Photoshop Filters | |

How to Draw Stylish Ladies
A ten hour tutorial covering how to draw women using the amazingly simply vector illustration tools in Adobe Flash.
| Module 1 | The Basics | |
| Your instructor will teach you the basics of vector illustration with Flash, which is a very simple approach to drawing, even for non-artists. | ||
| Unit 1 | Course Assets | |
| Unit 2 | How to Draw Stylish Ladies - Introduction | |
| Unit 3 | How to Draw Stylish Ladies - Initial Setup | |
| Unit 4 | Drawing Basics | |
| Module 2 | The Body | |
| This two and a half hour tutorial focuses on illustrating the body. | ||
| Unit 1 | Lady Body | |
| Unit 2 | Body Workshop | |
| Unit 3 | Lady in Gown | |
| Unit 4 | Body Silhouettes | |
| Module 3 | Hair Styles and Head Turns | |
| In this 90 minute session, we look at tips to illustrate hair and turn the head. | ||
| Unit 1 | Hair Styles | |
| Unit 2 | Head Turns | |
| Module 4 | Expressions, hands, and feet. | |
| In this 97 minute session, we gather together various “components” of the body to use in our final session. | ||
| Unit 1 | Expressions | |
| Unit 2 | Hands | |
| Unit 3 | Feet | |
| Module 5 | Final Pieces | |
| In this three hour session, we draw three final poses, focusing primarily on clothing techniques and shading. Each pose is a separate one hour video. | ||
| Unit 1 | Modern Girl | |
| Unit 2 | Greaser Girl | |
| Unit 3 | Modest Girl | |

Marvelous Logo Design
Learn how to create poster-quality logos from scratch uses Adobe Flash
| Module 1 | Marvelous Logo Design Course Assets | |
| Download the course assets. | ||
| Unit 1 | Marvelous Logo Design Course Assets | |
| Module 2 | Text Fundamentals in Adobe Flash | |
| In this section we will discuss the initial setup and fundamentals of manipulating text in Flash | ||
| Unit 1 | Initial Setup | |
| Unit 2 | Basics of Text in Adobe Flash | |
| Unit 3 | Lettering Inset and Expansion | |
| Module 3 | Adding Dimension and Texture | |
| In this section we will explore adding three-dimension aspects and masking textures in the logo. | ||
| Unit 1 | Gradients and Shadowing | |
| Unit 2 | Working with a Texture in Photoshop | |
| Unit 3 | Masking & Adding the Texture to Flash | |
| Unit 4 | Adding More 3-Dimensional Aspects | |
| Module 4 | Complimentary Enhancements around the Text | |
| In this section we will refine the almost-finished logo with some accompanying art. | ||
| Unit 1 | Adding Cracks and a Rocky Backdrop | |
| Unit 2 | Adding Lens Flares | |
| Unit 3 | Adding a Cosmic Star Effect | |
| Unit 4 | Adding an Optional Subtitle | |
| Unit 5 | Conclusion | |

CartoonSmart Classics - The Cartoonist Collection
The year: sometime in the 2000's. The Mac OS is "bubblier", Adobe Flash had just gotten this new feature called Filters, and CartoonSmart's owner and lead instructor sounds a few years younger. But if we're brave enough to post these oldies but goodies, you can find the courage to watch them. The craziest thing about these past greats: the illustration techniques taught back then still hold up today. Yes, Adobe Flash really hasn't changed much! Vector illustration in Flash is pretty much as its always been. Simply, straight-forward and an excellent tool for cartoonists!
| Module 1 | Course Assets | |
| This section contains the course assets for every tutorial in this collection. | ||
| Unit 1 | Download-able Videos | |
| Unit 2 | Course Assets | |
| Module 2 | Cartoonist Heads (4 hrs) | |
| This Adobe Flash tutorial teaches how to illustrate cartoon heads. The course looks at the basics of illustration, various expressions, and how to draw "turn-arounds" for various views of the same head. | ||
| Unit 1 | Cartoon Heads Part 1 | |
| Unit 2 | Cartoon Heads Part 2 | |
| Unit 3 | Cartoon Heads Part 3 | |
| Module 3 | Retro Futurism (6 hrs) | |
| This four-part lesson guides you step-by-step through illustrating in a retro-fururistic style. We'll start by looking at the history of this style (diners, classic cars), then put it to practice using Adobe Flash. | ||
| Unit 1 | References and Illustrating a Retro Diner Sign | |
| Unit 2 | Stylized Interface Design | |
| Unit 3 | Retro-Futuristic Office and Car | |
| Unit 4 | How to Draw a Fun, Futuristic Cityscape | |
| Module 4 | How to Draw Spokes Character (4 hrs) | |
| A spokes-character is a creative way to further the branding of your product or service. Over time, customers will identify your character with whatever you sell AND ideally, be reminded of your product more often. This course will teach you to design and animate your brand, app or product's spokes character using Flash. | ||
| Unit 1 | How to Draw Spokes Characters - Part 1 | |
| Unit 2 | How to Draw Spokes Characters - Part 2 | |
| Unit 3 | How to Draw Spokes Characters - Part 3 | |
| Module 5 | How to Draw Cartoon Backgrounds (5 hrs) | |
| The first lesson teaches the fundamentals of drawing backgrounds, like 1, 2, and 3 point perspective. Lesson two takes things further with 5 point and curvilinear perspective, focusing mostly on city-type scenes. The final lesson teaches how to draw elements like rocks, plants, mountains, and then how to animate a scene to create a parallax looping background. | ||
| Unit 1 | How to Draw Cartoon Backgrounds - Part 1 | |
| Unit 2 | How to Draw Cartoon Backgrounds - Part 2 | |
| Unit 3 | How to Draw Cartoon Backgrounds - Part 3 | |
| Module 6 | Comic Book Illustration (3 hrs) | |
| This three part lesson guides you through creating a comic-book style illustration from start to finish in Adobe Flash. | ||
| Unit 1 | Comic Book Illustration - Part 1 | |
| Unit 2 | Comic Book Illustration - Part 2 | |
| Unit 3 | Comic Book Illustration - Part 3 | |
| Module 7 | How to Draw Clothing (3 hrs) | |
| This relaxed, practice course is full of great tips and techniques for illustrating clothing. After the lessons, you can practice drawing clothing on any of the silhouettes provided in the example projects. | ||
| Unit 1 | How to Draw Clothing - Part 1 | |
| Unit 2 | How to Draw Clothing - Part 2 | |
| Unit 3 | How to Draw Clothing - Part 3 | |
| Module 8 | How to Draw Cartoon Bodies (6 hrs) | |
| This course teaches how to draw the body and play off the human form to create a more "cartoonish" body (like exagerating certain features). The bulk of the lesson is in Flash, but we also feature some quick sketching techniques to prepare for drawing the polished Flash versions. | ||
| Unit 1 | How to Draw Cartoon Bodies - Part 1 | |
| Unit 2 | How to Draw Cartoon Bodies - Part 2 | |
| Unit 3 | How to Draw Cartoon Bodies - Part 3 | |
| Unit 4 | How to Draw Cartoon Bodies - Part 4 | |
| Unit 5 | How to Draw Cartoon Bodies - Part 5 | |

Isometric Pixel Art Tutorial - Subscription Access
This tutorial begins with a blank Photoshop canvas and teaches you step by step, pixel by pixel how to draw the building above. You'll learn how to setup an isometric world to draw in and stick to it even when what you are drawing throws some curves at you.
| Module 1 | Isometric Pixel Art Video Tutorials | |
| This course is split into two parts... | ||
| Unit 1 | Isometric Pixel Art Video Tutorial - Part 1 | |
| Unit 2 | Isometric Pixel Art Video Tutorial - Part 2 | |
CartoonSmart Classics - The Professional Illustration Collection
This collection includes five more lessons from yesteryear, but all still relevant to the latest version of Adobe Flash. This bundle teaches logo design, shading, industrial design, interface design, and how to draw realistic faces.
| Module 1 | Course Assets | |
| You can download all the course assets / projects here. | ||
| Unit 1 | Download-able Videos | |
| Unit 2 | Course Assets | |
| Module 2 | Realistic Shading (2.5 hrs) | |
| Learn professional shading techniques using Adobe Flash. Watch the videos and practice along using the included (but unshaded) vector art. | ||
| Unit 1 | Realistic Shading - Part 1 | |
| Unit 2 | Realistic Shading - Part 2 | |
| Module 3 | Logo Design (3.5 hrs) | |
| Although this Logo Design course teaches plenty of illustration techniques in Flash, its primary goal is to inspire you with quick examples of many approaches you can try in the early design stages of a logo. Freelances artists are commonly asked to design or redesign logos for clients, and one single version is rarely enough. You'll be asked to create dozens of examples, and after taking this course you'll be better prepared to give a client exactly what they want. And keep in mind, corporate "identity" and brand recognition both rely heavily on an effective logo, so be sure to charge a client well for your design talents! | ||
| Unit 1 | Logo Design - Part 1 | |
| Unit 2 | Logo Design - Part 2 | |
| Unit 3 | Logo Design - Part 3 | |
| Module 4 | Industrial Design (2.5 hrs) | |
| This intermediate-level Flash illustration course focuses on realistic design, while creating a mobile device and compass. | ||
| Unit 1 | Industrial Design - Part 1 | |
| Unit 2 | Industrial Design - Part 2 | |
| Module 5 | Realistic Face Illustration Tutorial (3 hrs) | |
| This tutorial teaches how to draw realistic faces in Adobe Flash. | ||
| Unit 1 | Illustrating Realistic Faces Tutorial Part 1 | |
| Unit 2 | Illustrating Realistic Faces Tutorial Part 2 | |
| Unit 3 | Illustrating Realistic Faces Tutorial Part 3 | |
| Module 6 | Interface Design (7 hrs) | |
| This lengthy tutorial series teaches how to create general user interfaces, buttons, icons, options screens and more. The last hour teaches basic setup and coding for possible buttons or interactivity within the interfaces: mostly simple buttons and rollover events to trigger animation. | ||
| Unit 1 | Interface Design - Part 1 | |
| Unit 2 | Interface Design - Part 2 | |
| Unit 3 | Interface Design - Part 3 | |
| Unit 4 | Interface Design - Part 4 | |
| Unit 5 | Interface Design - Part 5 | |

Exploring Adobe Illustrator - Subscription Access
Professional artist, Brian Zaikowski brings teaches this amazing twenty-four hour Adobe Illustrator tutorial library. Yes, a full day’s worth of videos. But don’t go into shock thinking about giving up an entire weekend to watch all of these at once, because you don’t have to tackle them in any particular order. The videos in this collection are like books on a shelf, just waiting for the moment you need to learn everything about a particular tool or preference in Illustrator. Or for those true of heart that want to master Adobe Illustrator in a couple days, you can begin with the A’s and start eating up these videos like popcorn. There’s 111 in total, along with over 50 source files.
| Module 1 | The Tool Videos | |
| You can watch these videos below in any order. | ||
| Unit 1 | Course Assets | |
| Unit 2 | Adobe Illustrator Video Tutorial - Appearance Panel | |
| Unit 3 | Adobe Illustrator Video Tutorial - Artboards | |
| Unit 4 | Adobe Illustrator Video Tutorial - Arranging Objects | |
| Unit 5 | Adobe Illustrator Video Tutorial - Basic Shape Tools | |
| Unit 6 | Adobe Illustrator Video Tutorial - Blend Menu | |
| Unit 7 | Adobe Illustrator Video Tutorial - Blend Tool | |
| Unit 8 | Adobe Illustrator Video Tutorial - Blob Brush Tool | |
| Unit 9 | Adobe Illustrator Video Tutorial - Browse in Bridge | |
| Unit 10 | Adobe Illustrator Video Tutorial - Brushes Art | |
| Unit 11 | Adobe Illustrator Video Tutorial - Brushes Bristle | |
| Unit 12 | Adobe Illustrator Video Tutorial - Brushes Calligraphic | |
| Unit 13 | Adobe Illustrator Video Tutorial - Brushes Pattern | |
| Unit 14 | Adobe Illustrator Video Tutorial - Brushes Scatter | |
| Unit 15 | Adobe Illustrator Video Tutorial - Clipping Mask and Compound Paths | |
| Unit 16 | Adobe Illustrator Video Tutorial - Copy and Paste | |
| Unit 17 | Adobe Illustrator Video Tutorial - Color Settings | |
| Unit 18 | Adobe Illustrator Video Tutorial - Copy and Paste | |
| Unit 19 | Adobe Illustrator Video Tutorial - Creating Seamless Tiling Patterns | |
| Unit 20 | Adobe Illustrator Video Tutorial - Create Object Mosaic | |
| Unit 21 | Adobe Illustrator Video Tutorial - Edit Colors | |
| Unit 22 | Adobe Illustrator Video Tutorial - Crop or Trim Marks | |
| Unit 23 | Adobe Illustrator Video Tutorial - Define Pattern | |
| Unit 24 | Adobe Illustrator Video Tutorial - Document Setup | |
| Unit 25 | Adobe Illustrator Video Tutorial - Draw Normal Behind or Inside | |
| Unit 26 | Adobe Illustrator Video Tutorial - Effects > Distort and Transform > | |
| Unit 27 | Adobe Illustrator Video Tutorial - Envelope Distort | |
| Unit 28 | Adobe Illustrator Video Tutorial - Eraser, Scissors, Knife Tool | |
| Unit 29 | Adobe Illustrator Video Tutorial - Expand and Expand Appearance | |
| Unit 30 | Adobe Illustrator Video Tutorial - Extrude and Bevel | |
| Unit 31 | Adobe Illustrator Video Tutorial - File Info | |
| Unit 32 | Adobe Illustrator Video Tutorial - Find and Replace | |
| Unit 33 | Adobe Illustrator Video Tutorial - Flatten Transparency | |
| Unit 34 | Adobe Illustrator Video Tutorial - Free Transform Tool | |
| Unit 35 | Adobe Illustrator Video Tutorial - Graphic Styles | |
| Unit 36 | Adobe Illustrator Video Tutorial - Gradient Mesh From Object | |
| Unit 37 | Adobe Illustrator Video Tutorial - Gradient Mesh Tool | |
| Unit 38 | Adobe Illustrator Video Tutorial - Grouping and Locking Objects | |
| Unit 39 | Adobe Illustrator Video Tutorial - Hide and Show Objects | |
| Unit 40 | Adobe Illustrator Video Tutorial - Keyboard Shortcuts | |
| Unit 41 | Adobe Illustrator Video Tutorial - Layers Panel | |
| Unit 42 | Adobe Illustrator Video Tutorial - Lasso Tool | |
| Unit 43 | Adobe Illustrator Video Tutorial - Line Segment Tool | |
| Unit 44 | Adobe Illustrator Video Tutorial - Liquify Tools | |
| Unit 45 | Adobe Illustrator Video Tutorial - Live Paint | |
| Unit 46 | Adobe Illustrator Video Tutorial - Live Trace Supplement | |
| Unit 47 | Adobe Illustrator Video Tutorial - Live Trace | |
| Unit 48 | Adobe Illustrator Video Tutorial - Magic Wand Tool | |
| Unit 49 | Adobe Illustrator Video Tutorial - New Document Options | |
| Unit 50 | Adobe Illustrator Video Tutorial - New Window and New Views | |
| Unit 51 | Adobe Illustrator Video Tutorial - Paintbrush vs Pencil and Pen | |
| Unit 52 | Adobe Illustrator Video Tutorial - Path Functions | |
| Unit 53 | Adobe Illustrator Video Tutorial - Pencil Tools | |
| Unit 54 | Adobe Illustrator Video Tutorial - Pen Tools | |
| Unit 55 | Adobe Illustrator Video Tutorial - Pencil Tools | |
| Unit 56 | Adobe Illustrator Video Tutorial - Perspective Grid | |
| Unit 57 | Adobe Illustrator Video Tutorial - Pixel Preview Grid | |
| Unit 58 | Adobe Illustrator Video Tutorial - Place... | |
| Unit 59 | Adobe Illustrator Video Tutorial - Presets | |
| Unit 60 | Adobe Illustrator Video Tutorial - Rasterizing Objects | |
| Unit 61 | Adobe Illustrator Video Tutorial - Recolor Artwork | |
| Unit 62 | Adobe Illustrator Video Tutorial - Revert to Saved | |
| Unit 63 | Adobe Illustrator Video Tutorial - Rotate and Reflect | |
| Unit 64 | Adobe Illustrator Video Tutorial - Save for Microsoft Office | |
| Unit 65 | Adobe Illustrator Video Tutorial - Save as vs Export | |
| Unit 66 | Adobe Illustrator Video Tutorial - Scale Portions of Objects | |
| Unit 67 | Adobe Illustrator Video Tutorial - Save for Web and Devices | |
| Unit 68 | Adobe Illustrator Video Tutorial - Scripts | |
| Unit 69 | Adobe Illustrator Video Tutorial - Scale Shear and Reshape Tools | |
| Unit 70 | Adobe Illustrator Video Tutorial - Selection Tools | |
| Unit 71 | Adobe Illustrator Video Tutorial - Shape Builder Tools | |
| Unit 72 | Adobe Illustrator Video Tutorial - Slices | |
| Unit 73 | Adobe Illustrator Video Tutorial - Symbol Sprayer | |
| Unit 74 | Adobe Illustrator Video Tutorial - Templates | |
| Unit 75 | Adobe Illustrator Video Tutorial - Text Wrap | |
| Unit 76 | Adobe Illustrator Video Tutorial - Tool Alternates | |
| Unit 77 | Adobe Illustrator Video Tutorial - Tool Panel | |
| Unit 78 | Adobe Illustrator Video Tutorial - Transform Each | |
| Unit 79 | Adobe Illustrator Video Tutorial - Transform Effect | |
| Unit 80 | Adobe Illustrator Video Tutorial - Transform from Object Menu | |
| Unit 81 | Adobe Illustrator Video Tutorial - Type Tools | |
| Unit 82 | Adobe Illustrator Video Tutorial - Width Tools | |
| Unit 83 | Adobe Illustrator Video Tutorial - 3D Revolve Tool | |
| Module 2 | The Preference Videos | |
| You can watch the videos below in any order. | ||
| Unit 1 | Adobe Illustrator Video Tutorial - Anchor Point and Handle Display | |
| Unit 2 | Adobe Illustrator Video Tutorial - Anti Aliased Artwork | |
| Unit 3 | Adobe Illustrator Video Tutorial - Append Upon Opening Legacy Files | |
| Unit 4 | Adobe Illustrator Video Tutorial - Control Click to Select Objects Behind | |
| Unit 5 | Adobe Illustrator Video Tutorial - Constrain Angle | |
| Unit 6 | Adobe Illustrator Video Tutorial - Corner Radius | |
| Unit 7 | Adobe Illustrator Video Tutorial - Disable Auto Add Delete | |
| Unit 8 | Adobe Illustrator Video Tutorial - Double Click to Isolate | |
| Unit 9 | Adobe Illustrator Video Tutorial - Guides and Grid | |
| Unit 10 | Adobe Illustrator Video Tutorial - Leading Tracking and BaselineShift | |
| Unit 11 | Adobe Illustrator Video Tutorial - Font Preview Missing Glyph | |
| Unit 12 | Adobe Illustrator Video Tutorial - Keyboard Increment | |
| Unit 13 | Adobe Illustrator Video Tutorial - Leading Tracking and BaselineShift | |
| Unit 14 | Adobe Illustrator Video Tutorial - Object Selection by Path Only | |
| Unit 15 | Adobe Illustrator Video Tutorial - Reset All Warning Dialogs | |
| Unit 16 | Adobe Illustrator Video Tutorial - Scale, Strokes and Effects | |
| Unit 17 | Adobe Illustrator Video Tutorial - Select Same Tint Percentage | |
| Unit 18 | Adobe Illustrator Video Tutorial - Selection Tolerance | |
| Unit 19 | Adobe Illustrator Video Tutorial - Show Tool Tips | |
| Unit 20 | Adobe Illustrator Video Tutorial - Slices, Hyphenation and ScratchDisks | |
| Unit 21 | Adobe Illustrator Video Tutorial - Smart Guides | |
| Unit 22 | Adobe Illustrator Video Tutorial - Snap to Point | |
| Unit 23 | Adobe Illustrator Video Tutorial - Transform Pattern Tiles | |
| Unit 24 | Adobe Illustrator Video Tutorial - Type Path, Asian, English, Recent | |
| Unit 25 | Adobe Illustrator Video Tutorial - Units of Measurement | |
| Unit 26 | Adobe Illustrator Video Tutorial - Use Japanese Crop Marks | |
| Unit 27 | Adobe Illustrator Video Tutorial - Use Precise Cursors | |
| Unit 28 | Adobe Illustrator Video Tutorial - User Interface, File Handling, Appearance Black | |
| Unit 29 | Adobe Illustrator Video Tutorial - Use Preview Bounds | |
| Module 3 | Bonus - How to Draw Comic Strips with Adobe Illustrator | |
| Brian Zaikowski also teaches this amazing Adobe Illustrator & Photoshop course covering a topic he knows plenty about: comic strip creation! Brian is an accomplished illustrator with hundreds of comic strips in publications worldwide, and somehow CartoonSmart was lucky enough to get him to author this huge tutorial on what it takes to do what he does. Actually we just barricaded him in our office until he recorded all his secrets. Brian’s primary application in this lesson is Adobe Illustrator, so he’ll be working with vector art most of the time, but toward the end he finishes up with Photoshop for some of the shading and finishing touches. This is a fantastic tutorial and simply entertaining at times. Enjoy! | ||
| Unit 1 | Comics Strips with Adobe Illustrator - Assets | |
| Unit 2 | Comics Strips with Adobe Illustrator - Introduction | |
| Unit 3 | Comics Strips with Adobe Illustrator - Setting Up Perspective | |
| Unit 4 | Comics Strips with Adobe Illustrator - Display Case | |
| Unit 5 | Comics Strips with Adobe Illustrator - Display Case Wood Grain | |
| Unit 6 | Comics Strips with Adobe Illustrator - Sand Part 1 | |
| Unit 7 | Comics Strips with Adobe Illustrator - Sand Part 2 | |
| Unit 8 | Comics Strips with Adobe Illustrator - Tree Trunk | |
| Unit 9 | Comics Strips with Adobe Illustrator - Leaves of Grass | |
| Unit 10 | Comics Strips with Adobe Illustrator - Changing the Wood Grain | |
| Unit 11 | Comics Strips with Adobe Illustrator - Rocks | |
| Unit 12 | Comics Strips with Adobe Illustrator - Refining the Tree and Rock | |
| Unit 13 | Comics Strips with Adobe Illustrator - Pants Part 1 | |
| Unit 14 | Comics Strips with Adobe Illustrator - Pants Part 2 | |
| Unit 15 | Comics Strips with Adobe Illustrator - Pants Part 3 | |
| Unit 16 | Comics Strips with Adobe Illustrator - Snake Part 1 | |
| Unit 17 | Comics Strips with Adobe Illustrator - Snake Part 2 | |
| Unit 18 | Comics Strips with Adobe Illustrator - Glass | |
| Unit 19 | Comics Strips with Adobe Illustrator - Floor Guide and Man Sketch | |
| Unit 20 | Comics Strips with Adobe Illustrator - Woman Sketch | |
| Unit 21 | Comics Strips with Adobe Illustrator - Drawing the Man's Head | |
| Unit 22 | Comics Strips with Adobe Illustrator - Drawing the Man's Body Part 1 | |
| Unit 23 | Comics Strips with Adobe Illustrator - Drawing the Man's Body Part 2 | |
| Unit 24 | Comics Strips with Adobe Illustrator - Drawing the Woman Part 2 | |
| Unit 25 | Comics Strips with Adobe Illustrator - Drawing the Woman Part 1 | |
| Unit 26 | Comics Strips with Adobe Illustrator - Drawing the Woman Part 3 | |
| Unit 27 | Comics Strips with Adobe Illustrator - Walls and Floor | |
| Unit 28 | Comics Strips with Adobe Illustrator - Finish Room | |
| Unit 29 | Comics Strips with Adobe Illustrator - Finishing with Photoshop | |

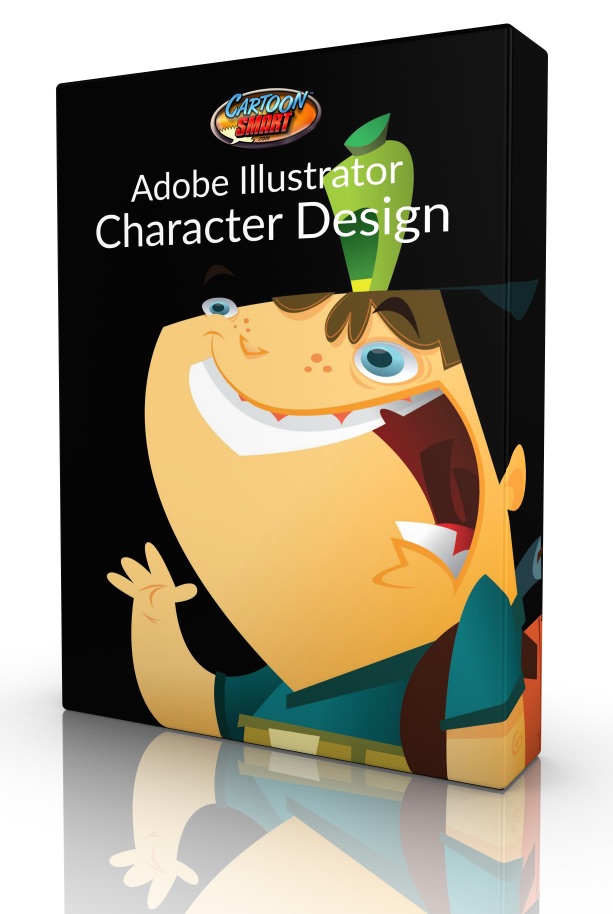
Adobe Illustrator Character Design - Subscription Access
Go from sketching to full color vector with professional illustrator, Mike Mac. This course uses Adobe Illustrator, but you can choose the design program of your choice (preferably vector based though).
| Module 1 | Retro Ghost Character - NEW! | |
| How to draw a retro style ghost character | ||
| Unit 1 | How to Draw a Retro Style Ghost Character | |
| Module 2 | Character Design | |
| This section teaches how to draw two highly stylized human characters. | ||
| Unit 1 | Course Assets | |
| Unit 2 | Stylized Human Character Design Part 1 | |
| Unit 3 | Stylized Human Character Design Part 2 | |
| Unit 4 | Stylized Human Character Design Part 3 | |
| Module 3 | Animal Character Design | |
| This video teaches how to sketch and use Adobe Illustrator to create various stylized animals. | ||
| Unit 1 | Animal Character Design | |
Animation
Adobe Animate or Flash Animation Training Bundle - Subscription Access
This HUGE bundle of courses includes Conan Sinclair's four popular "Tradigital Animation" courses along with a bonus course on 2D Character Rigging in Adobe Animate / Flash. Find out more about each course below. This collection is 31 hours in total!
| Module 1 | Tradigital Animation Head Movements - The Basics | |
| This first session covers basic animation techniques applicable to any program you choose to animate with, but Conan does spend some time early on teaching a few of the tools within Adobe Animate / Flash that he will be using throughout this series of lessons. | ||
| Unit 1 | Tradigital Animations Head Movements Tutorial - Assets | |
| Unit 2 | The Basics | |
| Module 2 | Tradigital Animation Head Movements - Head Turn Animations | |
| Learn how to do a head turn animation, starting with two key poses, then work with timing, ease-in and out’s, and in-between frames. | ||
| Unit 1 | Head Turn Animations | |
| Module 3 | Tradigital Animation Head Movements - Flexibility | |
| Learn how to get more flexibility in your animation when going from one keypose to another. | ||
| Unit 1 | Flexibility | |
| Module 4 | Tradigital Animation Head Movements - Lip Syncing | |
| This session covers dialogue animation using mouth shapes (or phonemes) and then the instructor brings in an audio file to sync an animation to. | ||
| Unit 1 | Lip Syncing - Part 1 | |
| Unit 2 | Lip Syncing - Part 2 | |
| Unit 3 | Lip Syncing Part 3 | |
| Module 5 | Tradigital Animation Head Movements - Cleaning Up | |
| This last session teaches how to clean up your animation, paint in a more polished, professional look to your frames, then include Layer effects to add a variety of styles to your final piece. | ||
| Unit 1 | Clean Up | |
| Module 6 | Tradigital Animation: Body Mechanics - The Basics | |
| This lesson teaches the basics of how to make your body animations look real. In the cartoon world anything is possible, but there’s still some “rules” to play by. You can’t have joints bending every which way, and that’s one of the things this part looks into. The second half of this lesson teaches a simple animation exercise by making a body move from one side to another. | ||
| Unit 1 | Tradigital Animation Body Mechanics - Course Assets | |
| Unit 2 | Basics - Part 1 | |
| Unit 3 | Basics - Part 2 | |
| Module 7 | Tradigital Animation: Body Mechanics - Jumping | |
| This part teaches how to animate a realistic jump, which is a great movement exercise to get an appreciation for weight. | ||
| Unit 1 | Jumping | |
| Module 8 | Tradigital Animation: Body Mechanics - Sitting and Standing. | |
| Think about how often a character on TV gets up or sits down in a scene. In your own animations, you’ll find this a useful exercise to add some movement to a scene where your characters might otherwise only be talking. | ||
| Unit 1 | Sitting | |
| Unit 2 | Standing | |
| Module 9 | Tradigital Animation: Body Mechanics - Walk Cycles Tutorial | |
| The next few lessons focus on every animators favorite (or possibly most dreaded) sequence: the walk/run cycle. Conan teaches his method of breaking these down into four manageable key poses, which he then adds in-betweens to. | ||
| Unit 1 | Walk Cycles | |
| Module 10 | Tradigital Animation: Body Mechanics - Run Cycles | |
| Runs are similar to walks in that you’ll learn to create four key poses of the cycle, but this time with a bounding motion to it, and the faster the run, the more of a lean is added to the character. | ||
| Unit 1 | Run Cycles | |
| Module 11 | Tradigital Animation: Body Mechanics - Advanced Movements | |
| This final lesson converts our side view cycles into front view and three-quarter view cycles, which can be a real test for new animators. Conan also teaches a walk cycle with a “double bounce” movement. | ||
| Unit 1 | Advanced Movements - Part 1 | |
| Unit 2 | Advanced Movements - Part 2 | |
| Unit 3 | Advanced Movements - Part 3 | |
| Module 12 | Tradigital Animation: Fight Scenes! - Setting up the Scene | |
| Conan Sinclair explains how important it is to begin with model sheets, an environment and storyboard before beginning to actually animate. Those assets are included along with source files throughout the rest of the tutorial. This part mostly focuses on setting up the stage with some initial animation of each character during the pan-in. | ||
| Unit 1 | Tradigital Animation - Fight Scenes Tutorial - Assets | |
| Unit 2 | Introduction | |
| Unit 3 | Setting up the Scene - Part 1 | |
| Unit 4 | Setting up the Scene - Part 2 | |
| Module 13 | Tradigital Animation: Fight Scenes! - Building Suspense | |
| No fight sequence would be complete without some initial “showboating” of each opponent’s skills. In this part Conan animates the Big Brute’s “bring it on” style fist clap and the Little Dude’s sequence of martial arts flare. | ||
| Unit 1 | Building Suspense - Part 1 | |
| Unit 2 | Building Suspense - Part 2 | |
| Unit 3 | Building Suspense - Part 3 | |
| Module 14 | Tradigital Animation: Fight Scenes! - Punching and Running | |
| In this lesson, the two key sequences are the Little Dude running to attack and the Big Brute sending a direct punch toward the camera. This part has some great examples of “smear”, similar to motion blur, but done by actually drawing in a smear of motion to the frame. | ||
| Unit 1 | Punching and Running - Part 1 | |
| Unit 2 | Punching and Running - Part 2 | |
| Module 15 | Tradigital Animation: Fight Scenes! - The Fight is on | |
| Kick, block, deflect, punch, there’s a little of everything in this part. | ||
| Unit 1 | The Fight Is ON! - Part 1 | |
| Unit 2 | The Fight Is ON! - Part 2 | |
| Unit 3 | The Fight Is ON! - Part 3 | |
| Module 16 | Tradigital Animation: Fight Scenes! - Clean Up and Compiling the Finished Scenes | |
| This lesson covers coloring the rough frames, then exporting PNG sequences to be compiled into a non-linear video editing program for a little extra sizzle. Conan uses After Effects, but you can edit together the finished scenes in the program of your choice. He’ll also teach how to add some effects to make the entire piece look less like it was made in Adobe Animate / Flash. | ||
| Unit 1 | Clean Up and Compiling the Finished Scenes | |
| Module 17 | Tradigital Animation: 2D FX -Introduction and Muzzle FX | |
| This tutorial focuses on the muzzle animation in Adobe Animate / Flash. | ||
| Unit 1 | Tradigital Animation – 2D FX - Assets | |
| Unit 2 | Tradigital Animation - 2DFX Tutorial - Introduction | |
| Unit 3 | Muzzles - Part 1 | |
| Unit 4 | Muzzles - Part 2 | |
| Module 18 | Tradigital Animation: 2D FX - Mini-Impacts | |
| This tutorial focuses on creating a mini-explosion in Adobe Animate / Flash. | ||
| Unit 1 | Impacts | |
| Unit 2 | Impacts with Smoke | |
| Module 19 | Tradigital Animation: 2D FX - Candle Flames and Fire | |
| The third session in the series teaches you how to animate a small flame and a larger fire in Adobe Animate / Flash | ||
| Unit 1 | Basic Candle | |
| Unit 2 | Candle in Wind | |
| Unit 3 | Fire Pre-Viz | |
| Unit 4 | Fire Final | |
| Module 20 | Tradigital Animation: 2D FX - Steam and Smoke FX | |
| The fourth session covers two similarly challenging effects, steam and smoke. | ||
| Unit 1 | Steam | |
| Unit 2 | Smoke | |
| Module 21 | Tradigital Animation: 2D FX - Running Water and Splash FX | |
| Water is the bane of most animators at some point or another. Conan will show you some easy tricks to alleviate that. | ||
| Unit 1 | Basic Water | |
| Unit 2 | Splash FX | |
| Module 22 | Tradigital Animation: 2D FX - The Grand Enchilda: A Giant Explosion | |
| And finally, the big bang. Conan animates an incredibly cool looking explosion effect. | ||
| Unit 1 | Big Explosions Part 1 | |
| Unit 2 | Big Explosions Part 2 | |
| Module 23 | 2D Character Rigging with Adobe Animate or Adobe Flash | |
| Join Conan Sinclair in this multi-hour course as he teaches the main technique for production-quality character rigging in Flash: symbol swapping, which allows for more freedom and complex animations than the other common technique, puppet rigging (simply rotating or moving the same artwork). While animation is the primary focus of this series, Conan will be starting from scratch and teaching how to illustrate the entire character as well. You’ll then learn how to use symbol swapping to animate the head (from multiple views), the mouth (for lip syncing) and the body. | ||
| Unit 1 | 2D Character Rigging Tutorial Assets | |
| Unit 2 | 2D Character Rigging Tutorial Intro | |
| Unit 3 | 2D Character Rigging Tutorial Part 1 | |
| Unit 4 | 2D Character Rigging Tutorial Part 2 | |
| Unit 5 | 2D Character Rigging Tutorial Part 3 | |
| Unit 6 | 2D Character Rigging Tutorial Part 4 | |
| Unit 7 | 2D Character Rigging Tutorial Part 5 | |
| Unit 8 | 2D Character Rigging Tutorial Part 6 | |
| Unit 9 | 2D Character Rigging Tutorial Part 7 | |
| Unit 10 | 2D Character Rigging Tutorial Part 8 | |
| Unit 11 | 2D Character Rigging Tutorial Part 9 | |
| Unit 12 | 2D Character Rigging Tutorial Part 10 | |
| Unit 13 | 2D Character Rigging Tutorial Part 11 | |
| Unit 14 | 2D Character Rigging Tutorial Part 12 | |
| Unit 15 | 2D Character Rigging Tutorial Part 13 | |
| Unit 16 | 2D Character Rigging Tutorial Part 14 | |
| Unit 17 | 2D Character Rigging Tutorial Part 15 | |
| Unit 18 | 2D Character Rigging Tutorial Part 16 | |
| Unit 19 | 2D Character Rigging Tutorial Part 17 | |
| Unit 20 | 2D Character Rigging Tutorial Part 18 | |
| Unit 21 | 2D Character Rigging Tutorial Part 19 | |
| Unit 22 | 2D Character Rigging Tutorial Part 20 | |
| Unit 23 | 2D Character Rigging Tutorial Part 21 | |
| Unit 24 | 2D Character Rigging Tutorial Part 22 | |
| Unit 25 | 2D Character Rigging Tutorial Part 23 | |
| Unit 26 | 2D Character Rigging Tutorial Part 24 | |
| Unit 27 | 2D Character Rigging Tutorial Part 25 | |
| Unit 28 | 2D Character Rigging Tutorial Part 26 | |


The Classic CartoonSmart Animation Collection
These “Classic” CartoonSmart lessons have been revived from the grave for a limited time. Watch in awe (or horror) as the Flash interface is transformed back to the mid-2000’s to a time when Adobe didn’t even own Flash and Filters were a “new” feature. What might surprise you though is the material actual holds up quite well. Animation tutorials are really about practicing core principals and key-framing symbols really hasn’t changed in Flash since the beginning.
| Module 1 | Two Leg Walk Cycle Animations Tutorial with Flash | |
| Learn to animate the walk cycles of various people and views in this 5 hour lesson. | ||
| Unit 1 | Source Video Files | |
| Unit 2 | Two Leg Walk Cycle Animations Tutorial - Assets | |
| Unit 3 | Two Leg Walk Cycle Animations Tutorial - Part 1 | |
| Unit 4 | Two Leg Walk Cycle Animations Tutorial - Part 2 | |
| Unit 5 | Two Leg Walk Cycle Animations Tutorial - Part 3 | |
| Module 2 | Four Leg Walk Cycle Animations with Flash | |
| Animate various four-legged creatures in this lengthy 4 hour lesson. Animals include, cats, dogs, horses, elephants and more. | ||
| Unit 1 | Four Leg Walk Cycle Animations Tutorial - Assets | |
| Unit 2 | Four Leg Walk Cycle Animations Tutorial - Part 1 | |
| Unit 3 | Four Leg Walk Cycle Animations Tutorial - Part 2 | |
| Unit 4 | Four Leg Walk Cycle Animations Tutorial - Part 3 | |
| Module 3 | Title and Bumper Animations with Flash | |
| Learn how to animate title / bumper sequences with a little logo design mixed in for good measure, in this 5 hour series. | ||
| Unit 1 | Title and Bumper Animations Tutorial - Assets | |
| Unit 2 | Title and Bumper Animations Tutorial - Part 1 | |
| Unit 3 | Title and Bumper Animations Tutorial - Part 2 | |
| Unit 4 | Title and Bumper Animations Tutorial - Part 3 | |
| Unit 5 | Title and Bumper Animations Tutorial - Part 4 | |
| Module 4 | Animate a Ninja with Adobe Flash | |
| This popular series from yesteryear teaches how to setup a scene where a ninja falls from the sky and does a series of movements on the ground. | ||
| Unit 1 | Animating a Ninja Tutorial - Assets | |
| Unit 2 | Animate a Ninja Tutorial - Part 1 | |
| Unit 3 | Animate a Ninja Tutorial - Part 2 | |
| Unit 4 | Animate a Ninja Tutorial - Part 3 | |
| Module 5 | Silhouette Animations with Flash | |
| Learn how to animate stylish animations in silhouette with Adobe Flash. This course teaches many techniques that wouldn't normally get taught in a character animation course. 2 hours. | ||
| Unit 1 | Silhouette Animations Tutorial - Assets | |
| Unit 2 | Silhouette Animations Tutorial - Part 1 | |
| Unit 3 | Silhouette Animations Tutorial - Part 2 | |
Animated Stills - Subscription Access
Transform still photographs or illustrations into moving masterpieces. You can see the finished example from this series here
| Module 1 | Animated Stills | |
| This section contains the source projects and all four parts of this course. | ||
| Unit 1 | Animated Stills - Projects and Assets | |
| Unit 2 | Animated Stills - Part 1 | |
| Unit 3 | Animated Stills - Part 2 | |
| Unit 4 | Animated Stills - Part 3 | |
| Unit 5 | Animated Stills - Part 4 | |
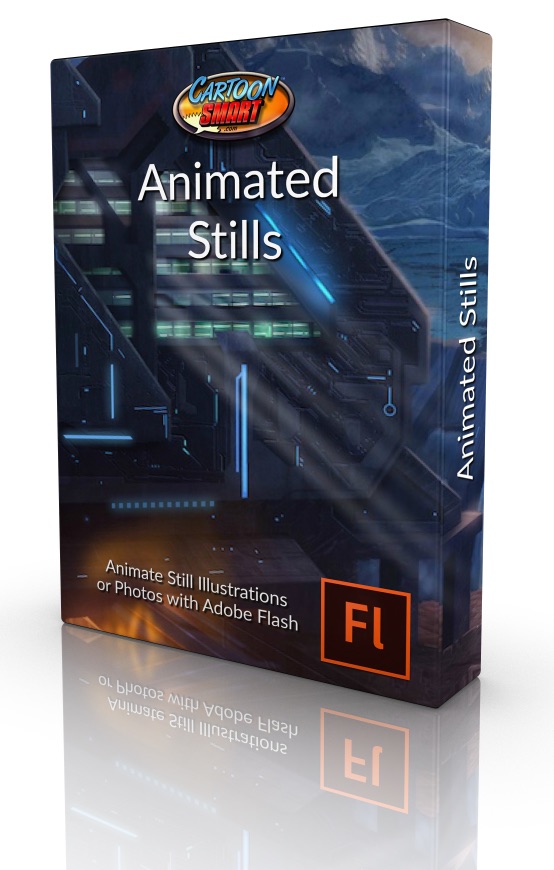
CartoonSmart Classics - The After Effects Collection
This collection of After Effects tutorials has stood the test of time and we're proudly offering it to our art subscribers as an extra bonus.
| Module 1 | After Effects Tutorial - Projects and Rendering Basics | |
| Download all the source projects and watch a quick tutorial on the basics of rendering in After Effects. | ||
| Unit 1 | After Effects Training Collection - All Projects and Assets | |
| Unit 2 | After Effects Training Collection - Rendering Basics | |
| Module 2 | After Effects Tutorial - Moving Masks Project | |
| Create movie quality tracking FX over your video or images. | ||
| Unit 1 | After Effects Training Collection - Moving Masks | |
| Module 3 | After Effects Tutorial - Arrivals Board Project | |
| An introduction to After Effects and how to create an Arrivals Board effect. | ||
| Unit 1 | After Effects Training Collection - Arrivals Board - Part 1 | |
| Unit 2 | After Effects Training Collection - Arrivals Board - Part 2 | |
| Module 4 | After Effects Tutorial - Cool Energy Project | |
| Learn how to create a swirling energetic effect in After Effects. | ||
| Unit 1 | After Effects Training Collection - Cool Energy | |
| Module 5 | After Effects Tutorial - Dynamic Text Project | |
| Learn how to import text from a .txt file and quickly render pre-animated movies. | ||
| Unit 1 | After Effects Training Collection - Dynamic Text | |
| Module 6 | After Effects Tutorial - Snow and 3D Images Project | |
| Learn how to animate snow particles and how to layer and animate still images. | ||
| Unit 1 | After Effects Training Collection - Snow Project | |
| Module 7 | After Effects Tutorial - 3D Street Project | |
| Learn how to combine Flash symbols and images to create a 3D After Effects scene. | ||
| Unit 1 | After Effects Training Collection - 3D Street Project | |
| Module 8 | After Effects Tutorial - Expressions | |
| Learn how to programmably move objects in this After Effects tutorial. | ||
| Unit 1 | After Effects Training Collection - Expressions | |
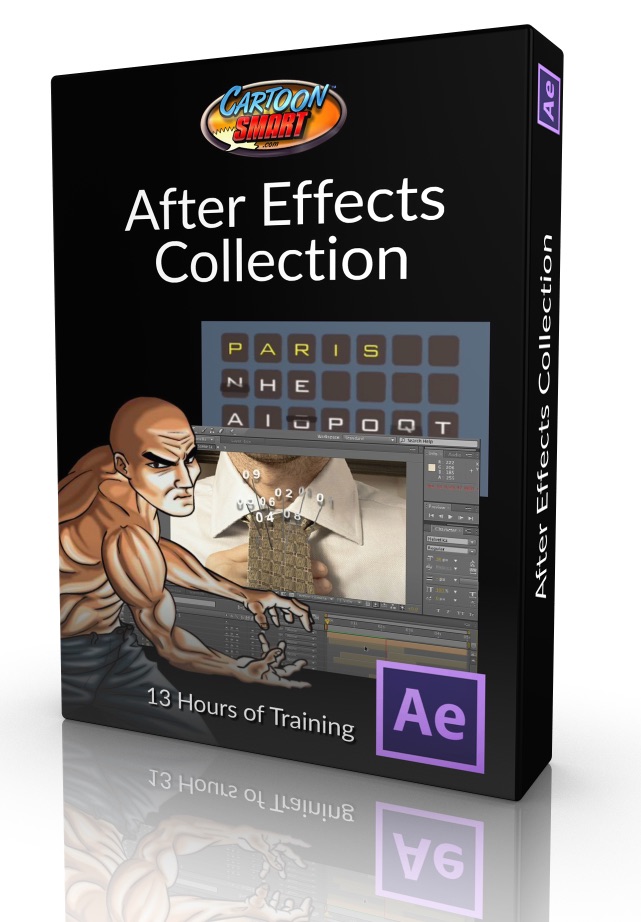
3D
Make Thousands With Your Art Using Unity3D & Maya - Subscription Access
A step by step guide on taking your illustrations & character designs & turning them into monthly cash from the Unity Asset Store.
| Module 1 | Course Overview and Introduction | |
| Short videos to welcome you to the course. | ||
| Unit 1 | Welcome to the Course | |
| Unit 2 | What is Unity 3D | |
| Unit 3 | Choosing Modeling and Animation Software | |
| Module 2 | Getting Ready | |
| In this section, we will discuss the starting sketch we will work off of and get a basic overview of Maya. | ||
| Unit 1 | Analyzing Character Design and Planning | |
| Unit 2 | Quick Maya Basics Overview | |
| Module 3 | Modeling in Maya | |
| In this series of tutorials, we will model a complete character in Maya. | ||
| Unit 1 | Modeling the Eyeball | |
| Unit 2 | Modeling the Eyelids | |
| Unit 3 | Modeling the Nose | |
| Unit 4 | Modeling the Head | |
| Unit 5 | Attaching the Nose | |
| Unit 6 | Modeling the Teeth and Tongue | |
| Unit 7 | Modeling the Body | |
| Unit 8 | Modeling the Leg - pt 1 | |
| Unit 9 | Modeling the Leg - pt 2 | |
| Unit 10 | Modeling the Arm - pt 1 | |
| Unit 11 | Modeling the Arm - pt 2 | |
| Unit 12 | Modeling the Arm - pt 3 | |
| Unit 13 | Modeling the Wings | |
| Unit 14 | Modeling Summary PDF File | |
| Module 4 | Texturing and UV Mapping in Maya | |
| In this series of tutorials we will texture the character we modeled in Maya. | ||
| Unit 1 | Quick UV Overview | |
| Unit 2 | Unwrapping Individual Meshes pt 1 | |
| Unit 3 | Unwrapping Individual Meshes pt 2 | |
| Unit 4 | Unwrapping Individual Meshes pt 3 | |
| Unit 5 | Unwrapping Individual Meshes pt 4 | |
| Unit 6 | Organizing and Exporting UV's | |
| Unit 7 | Final Touch Up's | |
| Module 5 | Painting Texture in Photoshop | |
| Through four videos we will discuss painting textures in Photoshop. | ||
| Unit 1 | Painting Texture in Photoshop - Pt 1 | |
| Unit 2 | Painting Texture in Photoshop - Pt 2 | |
| Unit 3 | Painting Texture in Photoshop - Pt 3 | |
| Unit 4 | Painting Texture in Photoshop - Pt 4 | |
| Module 6 | Rigging in Maya | |
| In this series of videos we will rig the entire character for animation in Maya. | ||
| Unit 1 | Quick Joints Overview | |
| Unit 2 | Joint Orientation | |
| Unit 3 | Rigging the Legs | |
| Unit 4 | Rigging the Arms and Hands | |
| Unit 5 | Rigging the Eyes | |
| Unit 6 | Rigging the Head | |
| Unit 7 | Rigging the Body | |
| Unit 8 | Rigging the Wings | |
| Unit 9 | Clean up and Test the Final Rig | |
| Unit 10 | Rigging Summary PDF File | |
| Module 7 | Animation in Maya | |
| Its finally time to animate! In this series of tutorials we will animate various actions for the character, then look at exporting for Unity. | ||
| Unit 1 | Quick Intro to the Animation Tools in Maya | |
| Unit 2 | Animating in Maya Tutorial - Part 1 - Flying | |
| Unit 3 | Animating in Maya Tutorial - Part 2 - Flying | |
| Unit 4 | Animating in Maya Tutorial - Part 3 - Attack | |
| Unit 5 | Animating in Maya Tutorial - Part 4 - Idle | |
| Unit 6 | Exporting from Maya to Unity Tutorial and Rendering with Mental Ray | |
| Unit 7 | Animation Summary PDF File | |
| Module 8 | Unity 3D - Putting It All Together | |
| In these tutorial we will bring the character into Unity, to prepare the animate model for sale in the Asset Store. | ||
| Unit 1 | Importing a 3D Model to Unity with Animations - pt 1 | |
| Unit 2 | Importing a 3D Model to Unity with Animations - pt 2 | |
| Unit 3 | Rotating the Character in Unity3D with a Mouse | |
| Unit 4 | Hooking up Maya's Animations to Unity's GUI Buttons for Easy Control | |
| Unit 5 | Fixing our Belly Deformation in Maya and Testing in Unity | |
| Unit 6 | Normal Map | |
| Unit 7 | Import Summary PDF File | |
| Module 9 | Unity 3D - Asset Store Submission | |
| This section we will discuss the in's and out's of selling your model in the Unity Asset Store. | ||
| Unit 1 | Asset Store Photoshop Template and Opening a New Account | |
| Unit 2 | Finish Creating Screenshots and Preview File for the Final Product | |
| Unit 3 | Setup New Package in Your Publishers Admin Page | |
| Unit 4 | Install Free Asset Store Tools and Submit For Approval | |
| Module 10 | Project Files | |
| Download the finished project files for this course. | ||
| Unit 1 | Final Project Instructions | |
| Unit 2 | Project Files | |
| Module 11 | Bonus Lessons | |
| Some miscellaneous topics we thought worth adding onto the course. | ||
| Unit 1 | Multicut Tool | |
| Unit 2 | Creating Custom Shelf | |

A Blender Game Character - Subscription Access
Learn Blender with over 9 hours of video tutorials, taught by John Nyquist, CartoonSmart's very first guest teacher and North America's first trainer to be certified by the Blender organization! So yes, he has the chops to teach anything Blender related and John returns to us in glorious fashion to teach this amazing series.
| Module 1 | Blender Quick Start | |
| If you've never used Blender before, or just need a refresher on some key concepts, begin here. | ||
| Unit 1 | Blender Quick Start Course Assets | |
| Unit 2 | Blender Quickstart Tutorial | |
| Module 2 | A Blender Game Character | |
| The real fun begins in ‘A Blender Game Character’, where you’ll learn how to take a basic illustration or idea for a character, model it in 3D, animate it, and ultimately export out sequential PNG files which you can use in your next app or game. | ||
| Unit 1 | A Blender Game Character - Course Assets | |
| Unit 2 | A Blender Game Character - Session 1 | |
| Unit 3 | A Blender Game Character - Session 2 | |
| Unit 4 | A Blender Game Character - Session 3 | |
| Unit 5 | A Blender Game Character - Session 4 | |
| Unit 6 | A Blender Game Character - Session 5 | |
| Unit 7 | A Blender Game Character - Session 6 | |
| Unit 8 | A Blender Game Character - Session 7 | |
| Unit 9 | A Blender Game Character - Session 8 | |
| Unit 10 | A Blender Game Character - Session 9 | |
| Unit 11 | A Blender Game Character - Session 10 | |

Modeling a Maya Roller Coaster - Subscription Access
...Learn from experienced instructor, Brian Heinrich, and become a master Maya modeler. The course is spread over dozens of short lessons to keep you on track. No pun intended.
| Module 1 | Introduction and Initial Setup | |
| Welcome to 'Modeling a Maya Roller Coaster'. In this series, we will cover various tools and methods to create our very own theme park ride. We will focus on creating the roller coaster itself, including the track and detailed car models, then work on the surrounding landscape: walkways, trashcans, grass, gates, flags, and turnstiles. | ||
| Unit 1 | Modeling a Maya Roller Coaster - Course Assets | |
| Unit 2 | Brief Introduction to Maya | |
| Unit 3 | Setting up your project folder | |
| Unit 4 | Hotkeys, setting preferences, and installing simple scripts | |
| Unit 5 | Overview of using polygonal objects | |
| Unit 6 | Modeling overview / workflow using nurbs surfaces | |
| Module 2 | Creating the roller coaster track | |
| In this second session, you will start with an empty scene and end with a fully modeled track system with supports. | ||
| Unit 1 | Research, ideas, and concepts | |
| Unit 2 | Practice with a simplified track | |
| Unit 3 | Creating the track course via an initial path | |
| Unit 4 | Initial path addendum | |
| Unit 5 | Design the track look and feel | |
| Unit 6 | Create the track geometry | |
| Unit 7 | Adding height to the track path | |
| Unit 8 | Creating track support: geometry | |
| Unit 9 | Adding banking to turns | |
| Unit 10 | Adding the track supports | |
| Module 3 | Creating the car | |
| In this session, you will focus on create the roller coaster car. | ||
| Unit 1 | Car overview - Research and design | |
| Unit 2 | Creating the car geometry - Base | |
| Unit 3 | Refine the car base and add details | |
| Unit 4 | Detailing the pipes and front bumper | |
| Unit 5 | Detailing the rivets, mirrors and more | |
| Unit 6 | Creating the seat base | |
| Unit 7 | Adding seat details | |
| Unit 8 | Seat restraints | |
| Unit 9 | Wheel geometry | |
| Unit 10 | Putting together the wheel assembly | |
| Unit 11 | Putting the car together and adding it to the track | |
| Module 4 | Entrance sign and ride logo | |
| In this section, we will create a fancy entrance sign and logo for the roller coaster ride. | ||
| Unit 1 | Sign overview and concept | |
| Unit 2 | Create base sign backdrop | |
| Unit 3 | Adding text and details | |
| Module 5 | Various theme park elements | |
| In this session, we will create extra elements to surround the coaster, including a trash can, gate, flag, turnstile, walkway, foliage and simple landscape. | ||
| Unit 1 | Theme park elements overview | |
| Unit 2 | Creating a trash can | |
| Unit 3 | Creating a flag | |
| Unit 4 | Creating a gate / pipe rail | |
| Unit 5 | Creating a turnstile | |
| Unit 6 | Creating walkways | |
| Unit 7 | Creating simple foliage | |
| Unit 8 | Creating simple foliage 2 | |
| Unit 9 | Creating a simple landscape | |
| Module 6 | Putting it all together | |
| In this short, final session we will bring everything together to create our finished masterpiece. | ||
| Unit 1 | Overview | |
| Unit 2 | Importing and placing elements | |
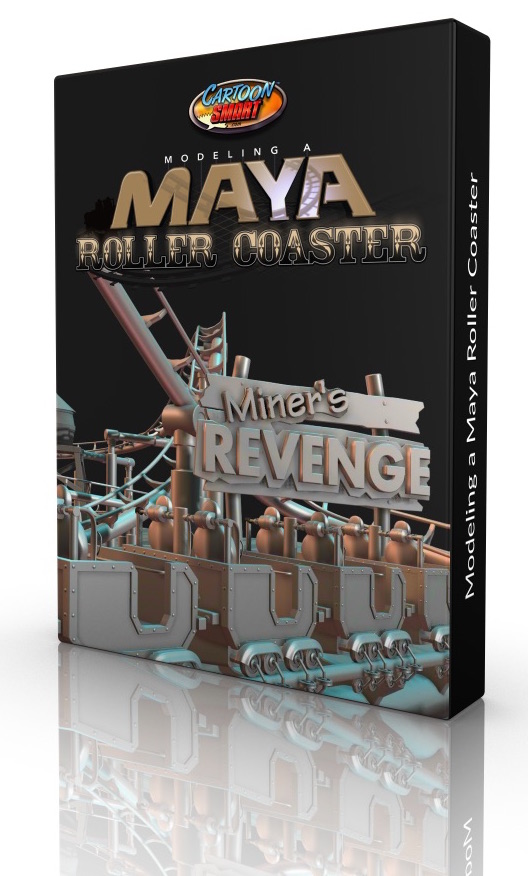
Character Animation with Maya - Subscription Access
This course aims to give anyone a quick start into the world of 3D animation but also guide you through some of the most challenging animation cycles with real-time instruction.
| Module 1 | Introduction to Animation in Maya | |
| In these videos your instructor, Conan Sinclair covers the basics with Maya while teaching a bouncing ball project. | ||
| Unit 1 | Maya Character Animation Course Assets | |
| Unit 2 | Introduction to Maya | |
| Unit 3 | Maya Tour as it Applies to Animation | |
| Unit 4 | The Classic Bouncing Ball Tutorial | |
| Unit 5 | Balance | |
| Module 2 | Turning a character | |
| In these videos Conan teaches how to make your character do a dramatic turn. | ||
| Unit 1 | Starting the animation | |
| Unit 2 | Adding anticipation and follow through | |
| Unit 3 | Smoothing it out | |
| Module 3 | Jumping | |
| In these videos, Conan teaches how to make your character do a realistic jump. | ||
| Unit 1 | Starting the Jump Animation | |
| Unit 2 | Finessing the Jump Animation | |
| Unit 3 | Final changes | |
| Module 4 | Walk Cycles Tutorial | |
| In this section, Conan guides you through making a looping walk cycle for the character. | ||
| Unit 1 | Walk Cycles part 1 | |
| Unit 2 | Walk Cycles part 2 | |
| Module 5 | Double bounce walk cycle | |
| In these videos, you'll learn how to animate a more stylized "double bounce" walk cycle. | ||
| Unit 1 | Double Bounce Walk Cycle Part 1 | |
| Unit 2 | Double Bounce Walk Cycle Part 2 | |
| Module 6 | Rendering and Texturing | |
| In this final video, you'll learn how to render and texture the character inside of an environment. | ||
| Unit 1 | Texturing and Rendering | |
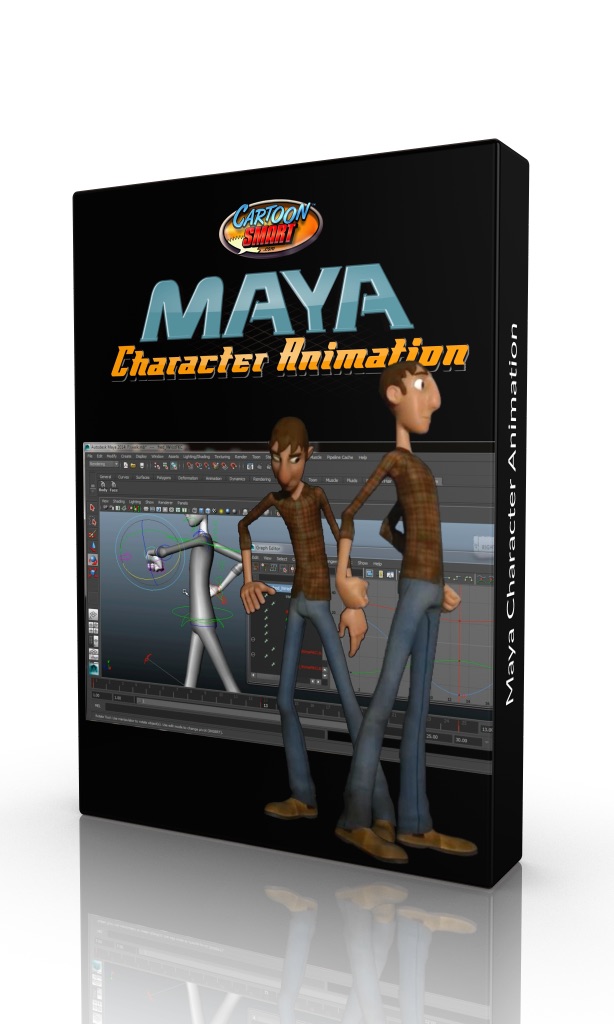
Actionscript 3
Actionscript 3 Game Development Tutorial Bundle - Subscription Access
A huge compilation of over 70 hours of Flash and Actionscript 3 training. Adobe Flash can export to either iOS, Android or HTML5 based apps.
| Module 1 | Actionscript 3 Game Development Bundle - All Course Assets | |
| Download all the resource files for each course in one zip file. | ||
| Unit 1 | All Course Assets | |
| Module 2 | The Ultimate Actionscript 3 Basics Course | |
| The ideal starting course for brand new AS3 learners | ||
| Unit 1 | Ultimate Actionscript 3 Basics Course - Basic Preferences and Properties | |
| Unit 2 | Ultimate Actionscript 3 Basics Course - MovieClips From the Library & Custom Cursors | |
| Unit 3 | Ultimate Actionscript 3 Basics Course - Programming Buttons and Variable Scope | |
| Unit 4 | Ultimate Actionscript 3 Basics Course - Staging and Scripted Tweening | |
| Unit 5 | Ultimate Actionscript 3 Basics Course - Timers and TextFields | |
| Unit 6 | Ultimate Actionscript 3 Basics Course - Arrays and Programming a Matching Game | |
| Unit 7 | Ultimate Actionscript 3 Basics Course - Card Games using MovieClips Identified by Child | |
| Unit 8 | Ultimate Actionscript 3 Basics Course - Loading XML Files to Use in a Dynamic Slideshow | |
| Unit 9 | Ultimate Actionscript 3 Basics Course - Using FlashVars to Make a Dynamic FLVPlayer | |
| Unit 10 | Ultimate Actionscript 3 Basics Course - Particle FX, Keyboard Controls and Audio Players | |
| Unit 11 | Ultimate Actionscript 3 Basics Course - Program a Simple Space Invasion Game | |
| Unit 12 | Ultimate Actionscript 3 Basics Course - Object Oriented Programming | |
| Module 3 | Actionscript 3 Side Scrolling Tutorial | |
| Learn how to create the side scroller you've always dreamt of playing. | ||
| Unit 1 | Actionscript 3 Side Scrolling Tutorial - Introduction | |
| Unit 2 | Actionscript 3 Side Scrolling Tutorial - Part 1 Custom Timer | |
| Unit 3 | Actionscript 3 Side Scrolling Tutorial - Part 2 | |
| Unit 4 | Actionscript 3 Side Scrolling Tutorial - Part 3 | |
| Unit 5 | Actionscript 3 Side Scrolling Tutorial - Part 4 | |
| Module 4 | Mobile Actionscript 3 Basics Tutorial | |
| Learn Actionscript 3 code related to mobile development, and exporting your Flash project to iOS or Android. Feel free to watch these videos in ANY order. | ||
| Unit 1 | Mobile Actionscript 3 Basics - The Accelerometer | |
| Unit 2 | Mobile Actionscript 3 Basics - Touch Events | |
| Unit 3 | Mobile Actionscript 3 Basics - Gestures | |
| Unit 4 | Mobile Actionscript 3 Basics - Orientation | |
| Unit 5 | Mobile Actionscript 3 Basics - Testing on the iPhone | |
| Unit 6 | Mobile Actionscript 3 Basics - CameraRoll | |
| Unit 7 | Mobile Actionscript 3 Basics - Testing on Android | |
| Unit 8 | Mobile Actionscript 3 Basics - Testing on Android Emulator | |
| Unit 9 | Mobile Actionscript 3 Basics - Previous As3 Files | |
| Module 5 | Actionscript 3 Pinball Games Tutorial | |
| This is a great course for AS3 programmers that want to learn all kind of physics tricks even if they aren't building a pinball machine. | ||
| Unit 1 | Actionscript 3 Pinball Games Tutorial | |
| Unit 2 | Actionscript 3 Pinball Games Tutorial - Part 2 | |
| Unit 3 | Actionscript 3 Pinball Games Tutorial - Part 3 | |
| Unit 4 | Actionscript 3 Pinball Games Tutorial - Part 4 | |
| Unit 5 | Actionscript 3 Pinball Games Tutorial - Part 5 | |
| Module 6 | Actionscript 3 Sling Shot Games Tutorial | |
| Ready. Set. Sling. Learn the code to program a game where users pull back an object and aim toward a target off (or on) screen. | ||
| Unit 1 | Actionscript 3 Sling Shot Games Tutorial | |
| Unit 2 | Actionscript 3 Sling Shot Games Tutorial - Export Notes for Android | |
| Module 7 | Actionscript 3 Tank Games Tutorial | |
| Learn Actionscript 3 while building a tank game. Navigate around walls and fire on your enemies. | ||
| Unit 1 | Actionscript 3 Tank Games Tutorial 1 | |
| Unit 2 | Actionscript 3 Tank Games Tutorial 2 | |
| Unit 3 | Actionscript 3 Tank Games Tutorial 3 | |
| Unit 4 | Actionscript 3 Tank Games Tutorial 4 | |
| Unit 5 | Actionscript 3 Tank Games Tutorial 5 | |
| Module 8 | Actionscript 3 Dart Games Tutorial | |
| Learn how to program a darts game in Flash with Actionscript 3. Aiming, scoring, and everything else related to making a dart game is taught from scratch. | ||
| Unit 1 | Actionscript 3 Darts Part 1 | |
| Unit 2 | Actionscript 3 Darts Part 2 | |
| Module 9 | Actionscript 3 Block Drop Games Tutorial | |
| Learn how to program a Tetris-style block drop game using Actionscript 3. | ||
| Unit 1 | Actionscript 3 Block Drop Tutorial - Part 1 | |
| Unit 2 | Actionscript 3 Block Drop Tutorial - Part 2 | |
| Unit 3 | Actionscript 3 Block Drop Tutorial - Part 3 | |
| Unit 4 | Actionscript 3 Block Drop Tutorial - Part 4 | |
| Module 10 | Actionscript 3 Boulder Dodge Games Tutorial | |
| This tutorial will teach brand new users to Actionscript the fundamentals of Object Oriented Programming while building a classic Asteroids style game. | ||
| Unit 1 | Actionscript 3 Boulder Dodge Tutorial - Creating the Spaceship | |
| Unit 2 | Actionscript 3 Boulder Dodge Tutorial - Extending Custom Classes | |
| Unit 3 | Actionscript 3 Boulder Dodge Tutorial - Custom Events | |
| Unit 4 | Actionscript 3 Boulder Dodge Tutorial - Game Interaction | |
| Unit 5 | Actionscript 3 Boulder Dodge Tutorial - Conclusion | |
| Module 11 | Actionscript 3 Missile War Games Tutorial | |
| Learn how to program an Actionscript 3 game where players aim precisely and conserve ammo to destroy enough targets to pass each level. | ||
| Unit 1 | Actionscript 3 Missile War Games Tutorial - Part 1 | |
| Unit 2 | Actionscript 3 Missile War Games Tutorial - Part 2 | |
| Unit 3 | Actionscript 3 Missile War Games Tutorial - Part 3 | |
| Module 12 | Actionscript 3 Strategy Games 1 - Terrain Generation | |
| In part one, you’ll learn how to create terrains, use spatial averaging, draw with the graphics class, deal with bits, work with connected component labeling to detect regions, and more. | ||
| Unit 1 | Actionscript 3 Strategy Games Tutorial - Terrain Generation | |
| Unit 2 | Actionscript 3 Strategy Games Tutorial - All Projects | |
| Module 13 | Actionscript 3 Strategy Games - Part 2 - A* Pathfinding | |
| The A* pathfinding algorithm is the most popular method of finding a path between two points. In part two you will: | ||
| Unit 1 | Actionscript 3 Strategy Games Tutorial - A* Pathfinding | |
| Module 14 | Actionscript 3 Strategy Games - Part 3 - State Machines | |
| This huge final section completes your strategy game! | ||
| Unit 1 | Actionscript 3 Strategy Games Tutorial - State Machines - Part 1 | |
| Unit 2 | Actionscript 3 Strategy Games Tutorial - State Machines - Part 2 | |
| Unit 3 | Actionscript 3 Strategy Games Tutorial - State Machines - Part 3 | |
| Unit 4 | Actionscript 3 Strategy Games Tutorial - State Machines - Part 4 | |
| Unit 5 | Actionscript 3 Strategy Games Tutorial - State Machines - Part 5 | |
| Unit 6 | Actionscript 3 Strategy Games Tutorial - State Machines - Part 6 | |
| Unit 7 | Actionscript 3 Strategy Games Tutorial - State Machines - Part 7 | |
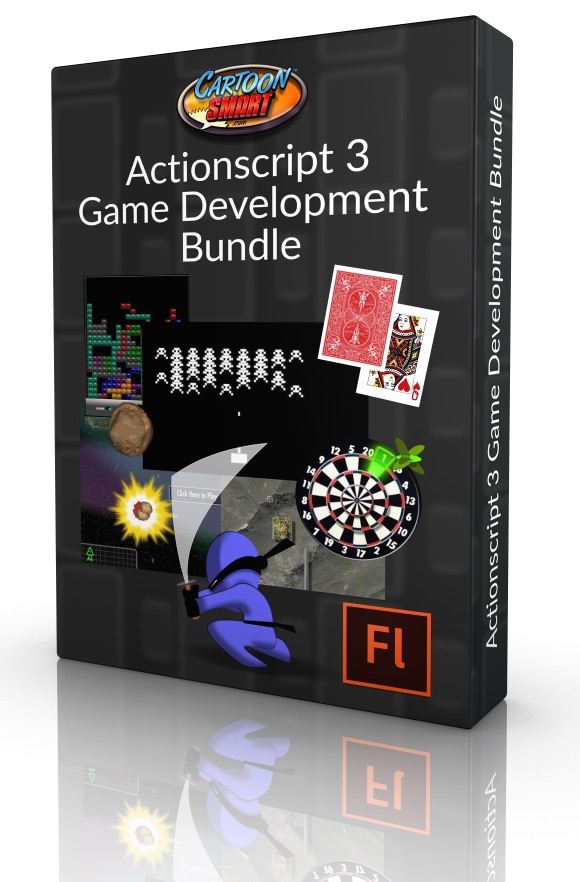
Miscellaneous
Developer's Survival Bag
Anything we can think of to help save the day!
| Module 1 | Resizing of Images in Photoshop using Batch Actions | |
| Need to do mass conversions of images, perhaps for Retina display devices? This video will save you a lot of time. You can also rename images as well. | ||
| Unit 1 | Batch Resizing Images in Photoshop | |
| Module 2 | Troubleshooting Xcode | |
| In this section we'll look at tips for troubleshooting an unruly Xcode. | ||
| Unit 1 | Tips for Submitting an Apple Watch App | |
| Module 3 | Saving Input Text and NSUserDefaults in Swift 1.2 | |
| This short iOS video tutorial will show you to use an UITextField in a Sprite Kit based game to enter input text (for example the player's name) and keep that data saved over the lifespan of the app in an SKLabelNode. | ||
| Unit 1 | Saving Input Text and NSUserDefaults in Swift 1.2 | |

Bonus Content
Monthly Game Art Bonus - Subscription Access
We're adding a bonus gift every month for our loyal subscribers. Subscribers have all month to download the latest goodies, yearly subscribers can always access past bonuses.
| Module 1 | Download this Month's bonus! | |
| Click the link below... | ||
| Unit 1 | Four Knights on Horseback - Royalty Free Game Art | |
| Module 2 | Expired Bonuses - But Still Available to Yearly Subscribers | |
| Our previous monthly bonuses are always available to our Yearly Subscribers (you can also find a single zip file of all our past monthly bonuses in your Account History). | ||
| Unit 1 | Ice Monster - Royalty Free Game Art | |
| Unit 2 | Hairy Zombie - Royalty Free Game Art | |
| Unit 3 | G.I. Zombie - Royalty Free Game Art | |
| Unit 4 | Battle Ship Piece - Royalty Free Game Art | |
| Unit 5 | Lava Station - Royalty Free Game Art | |
| Unit 6 | Exposed Brain Zombie - Royalty Free Game Art | |
| Unit 7 | Jack the Thug - Royalty Free Game Art | |
| Unit 8 | Adventure Boy - Royalty Free Game Art | |
| Unit 9 | Android Boss - Royalty Free Game Art | |
| Unit 10 | Alien Boss - Royalty Free Game Art | |
| Unit 11 | Dungeon Guard - Royalty Free Game Art | |
| Unit 12 | Executioner - Royalty Free Game Art | |
| Unit 13 | Castle Guard - Royalty Free Game Art | |
| Unit 14 | Genki and the Dragon Sword - Royalty Free Game Art | |
| Unit 15 | Brock: Future Soldier - Royalty Free Game Art | |
| Unit 16 | Purple Alien - Royalty Free Game Art | |
| Unit 17 | Farmer Zombie - Royalty Free Game Art | |
| Unit 18 | War Machine - Royalty Free Game Art | |
| Unit 19 | Army Joe - Royalty Free Game Art - Yearly Subscribers Only | |
| Unit 20 | "Big Hands" Robot Character - Royalty Free Game Art - Yearly Subscribers Only | |
| Unit 21 | Zombie Army Character - Royalty Free Game Art - Yearly Subscribers Only | |
| Unit 22 | The Ninja - Royalty Free Game Art - Yearly Subscribers Only | |
| Unit 23 | Shadow Boy - Royalty Free Game Art - Yearly Subscribers Only | |
| Unit 24 | King Dracula - Royalty Free Game Art - Yearly Subscribers Only | |
| Unit 25 | The Armored Samurai - Royalty Free Game Art - Yearly Subscribers Only | |
| Unit 26 | The Executioner - Royalty Free Game Art - Yearly Subscribers Only | |
| Unit 27 | The Goblin - Royalty Free Game Art - Yearly Subscribers Only | |
| Unit 28 | The Thug - Royalty Free Game Art - Yearly Subscribers Only | |
| Unit 29 | The Ogre - Royalty Free Game Art - Yearly Subscribers Only | |
| Unit 30 | King Vlad - Royalty Free Game Art - Yearly Subscribers Only | |
| Unit 31 | Darkness Knight - Royalty Free Game Art - Yearly Subscribers Only | |
| Unit 32 | Golden Knight - Royalty Free Game Art - Yearly Subscribers Only | |